|
You may have seen on Twitter yesterday that the DLC team completed an iPad challenge. What is an iPad Challenge, and why did we do it? Great question! We challenged ourselves to spend a day in the life of a 1:1 learner here in CISD. That's right, we ditched our MacBooks, keyboards, and even our Apple Pencils in order to experience a day just like our learners do. Back at TCEA, I had challenged myself to leave my MacBook in my hotel room each day. I had a fabulous time, although, I'll admit, I did use my Apple Pencil and keyboard during that week to take notes. I was admittedly nervous about this challenge, not because I'd miss my MacBook, but because I knew I would miss the Pencil! However, I successfully completed the challenge, and had some major "Aha!" moments along the way. How did the challenge work? My teammate Alli Pryor led the charge for this challenge, and she worked with DLCs Brad Cook and Brian Timm to create a Bingo board of tasks for us to complete during our day. These purposeful tasks made the experience much more authentic and aligned with how learners spend their day. 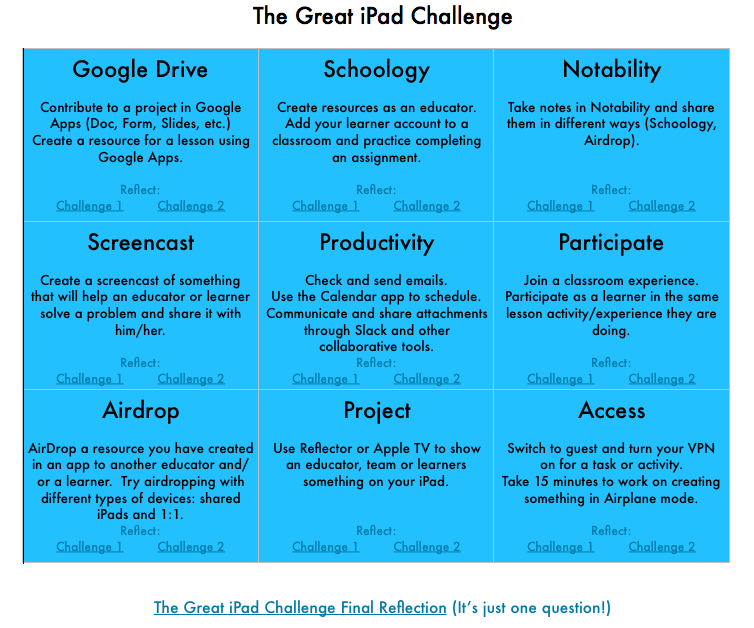  The Bingo board was created in Pages, and on the day of the challenge, I made my own copy of the board in order to track my completed tasks. I'm competitive and an avid Bingo player, so I went for a blackout! You'll also notice the reflections linked below each task. DLC Brooke Sims and I worked together to create reflection spaces on Schoology discussion boards in order to give everyone the opportunity to jot down their successes and struggles for each task. Do you know what the coolest thing was about the discussion boards? There were struggles, sure, but overall, the comments reflected more successes than frustrations, everyone learned something, and everyone shared cool tricks they discovered - or even simply remembered - throughout the day. What were the results? I feel that, personally, the challenge was successful because I developed empathy for the experiences - successes and struggles - of our learners. When things didn't work exactly as I wanted them to, I had the opportunity to problem-solve and seek alternate solutions to complete the tasks I was doing. It reminded me of some of the most basic trouble-shooting skills I used to teach my learners (restarting the iPad, toggling the wifi on and off, restarting apps), and reinvigorated me to use some of my favorite apps that I've been ditching in favor of my MacBook (like the Apple native apps Pages, Keynote, and Numbers; Chatterpix Kids; and Google Drive apps, especially Google Keep). Above all, what I valued most about the experience was the refreshing opportunity to consider the tasks I complete each day and the tools at my disposal. I realized that even though often times my MacBook is the most efficient device to use to complete many tasks, it isn't always the most effective. Moving forward, I will be more intentional about considering my goals and then selecting the tool that best fits the task - just as I want our learners to do. Check out the Twitter moment below that features my teammates' reflections on The Great iPad Challenge! Are you inspired to take on the challenge? I'd love to hear from you - and I can share the task card template if you want to play Bingo, too!
0 Comments
I've already shared my notes from TCEA, but I want to give you more details about some of the things I learned. Over the next few posts, I'll be sharing my top TCEA takeaways, starting with... 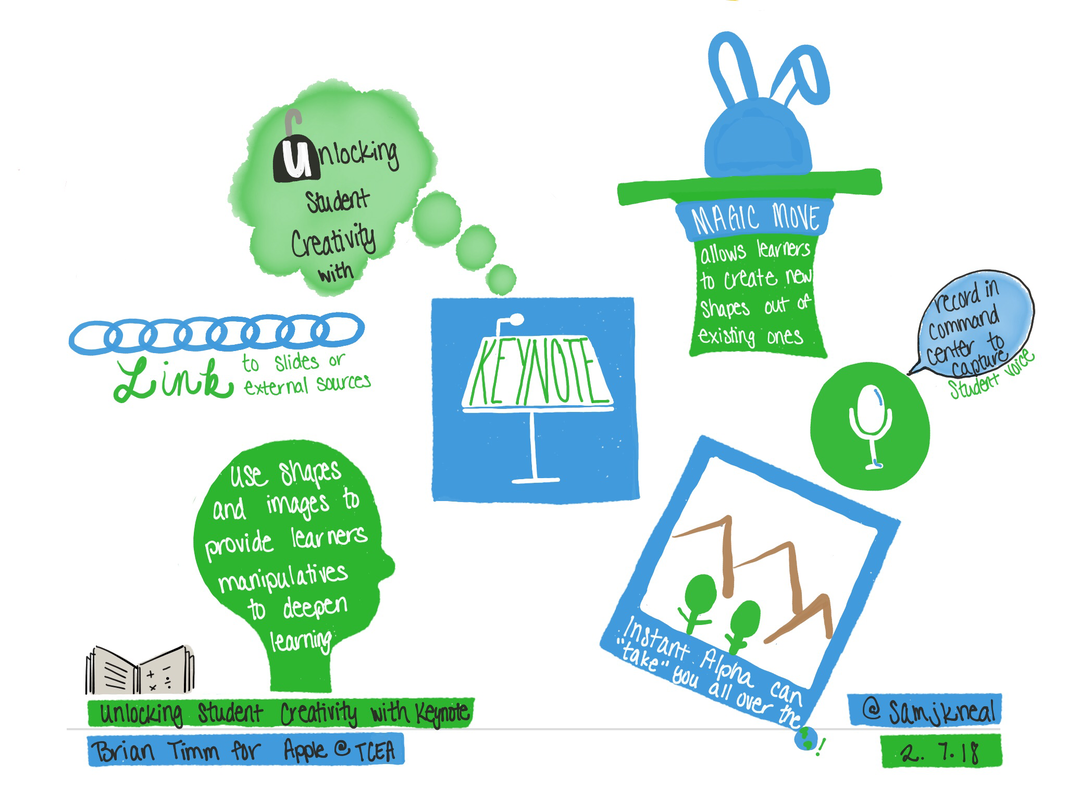 My TCEA notes. My friend and teammate, Brian Timm, is also the Apple Distinguished Educator who presented this session at TCEA. Although I have become very comfortable using Keynote on my MacBook, I was really happy that I decided to focus on using my iPad during this session. It made me appreciate how seamless the transition is between devices, and how accessible and user-friendly this interface is - which is great news for using this app with learners! Change Your Thinking Since this session, I've been sharing with more and more educators the power of Keynote. Typically, the exchange will go something like this: Me: Do you ever use Keynote in your classroom? Educator: Keynote... I've heard of that. Isn't it just a presentation software like PowerPoint? Me: It is a presentation software... but it is SO MUCH MORE than that! Let's unpack some of the reasons why we should think of Keynote not as a presentation software for the educator to use, but more as a tool that can unlock learner creativity and transform the way they are able to make meaning and share what they know. Take Your Class "All Over the World" with Instant Alpha Instant Alpha is the image feature that "magically erases" backgrounds out of images - I use that phrase specifically for anyone who uses Photoshop. However, instead of bringing your image into Photoshop, struggling through figuring out how to use the magic eraser, saving the image, then uploading it into your presentation, you simply use Instant Alpha in Keynote to create the same effect - in far fewer clicks! Check out this example of how Instant Alpha can transform your images: Record in the Command Center to Capture Learner Voice We know now more than every before that we can and should allow learners to use a variety of modalities to show what they know, and it seems that speaking is becoming more highly regarded as a valuable expression tool for learners. Right inside of Keynote, learners can record in order to explain their thinking. This does not necessarily have to replace writing, since you have various text features within Keynote, but it can supplement, enhance, and transform how they're able to demonstrate their thinking. Below you can view examples of learners using Keynote as well as a multitouch book that will guide you through using Keynote to tell stories: Digital Manipulatives to Deepen Learning Apple apps like Pages and Keynote have a library of shapes that are not only polished looking, but customizable. You can change the size, shape, and color, add a border to turn the shape into an outline, give the shape a shadow, or even use it as a text box. Think of the things that could be done with these! You could provide learners with a template you've created so that they can practice things like... Animate Using Magic Move There's a reason this feature is called Magic Move - it really is magical what happens when you use this transition to animate your slides. In short, using Magic Move between two or more slides with the same shapes or text in them creates a seamless transition in which your audience sees the path of transition, even when objects change color or size, like this: That's just my basic example. Scroll back up and watch (or rewatch) the Demonstrating the Digestive System I linked above. That is an example of shapes and Magic Move in the hands of a learner! Here's another incredible example of what can be done with Magic Move: The Possibilities Are Endless They truly are! Do you use Keynote in your classroom? Do your learners use Keynote? I'd love to hear about the experience, as well as see some of your examples! Share in the comments below! 
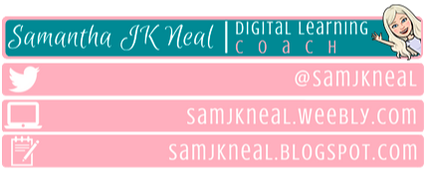
 The Internet Is Down, Now What? You may remember that fateful day two weeks ago when the Internet went down for our entire district. Days like that can really throw a wrench into anyone's plans, but my friend and fellow DLC Alli was inspired to explore ways to use the iPad without wifi. Alli provides a list that is definitely worth printing - in case, you know, the Internet goes down again.  Focus on the Learning: The Triple E Framework I recently participated in a book study over Liz Kolb's book Learning First, Technology Second, which discusses the need for and provides a technology integration metric that focuses on exactly what the book title suggests: putting learning at the forefront of decisions regarding technology integration. Check out my friend and fellow DLC Megan's post about the Triple E Framework.  Moving from Feedback to Feedforward One of my favorite education podcasts - really, one of my favorite podcasts, period - is Jennifer Gonzalez's Cult of Pedagogy. Technically this is from January, but since this is my first Link Roundup, I'm going to include it anyway. In this podcast, Gonzalez interviews Joe Hirsch, author of The Feedback Fix: Dump the Past, Embrace the Future, and Lead the Way to Change. Gonzalez interviews Hirsch to find out exactly what feedforward is, and how and why it works. (Not a fan of podcasts? Don't worry, Gonzalez provides a transcript for your reading pleasure.)  I'm a SOLE Man... No, this post isn't about the Blues Brothers song, although it does feature a fun song lyric. Inspired by Pinkerton 4th grade educator Kori Haverstick, I led my team in a Self-Organized Learning Environment with the StartSOLE app. My friend and fellow DLC Megan reflects on her experience in her post.  An Apple a Week DLC Blog Series Lastly, don't forget to check out the winter blog series: An Apple a Week, led by my friend and fellow DLC Alli.  Sometimes I feel like I spend a lot more time trying to figure something out than is really necessary - I Google, I read, I seek help, I attempt, and sometimes end up unsuccessful and frustrated. That's how I was feeling last night when I finally - finally - figured out how to make an image "clickable" in my Outlook email signature. (By clickable, I mean that if someone were to receive an email from me and click the image, it would take them to a link I have provided.) Why did this ever matter to me? For one thing, adding the image as part of or as your email signature looks beautiful and polished. For another, it's functional! Both versions of my email signature, pictured below, link to my Twitter profile, website, and blog.
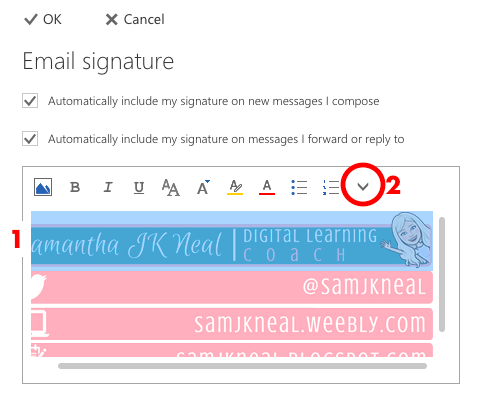
Over the summer I spent time trying to figure out how to create a beautiful, clickable email signature, and after a lot of frustration, stepped away from my quest. I came back to my quest with a vengeance, however, when I got an email yesterday that had - yes, you guessed it! - a clickable image in the signature! Could I have simply replied to this email to ask how this magic was accomplished? Yes! Did I do that? No! I was determined to figure it out on my own. I did more Googling. I read some really techy articles that I didn't understand. I figured out that I couldn't even do the techy things that were being suggested because my access level doesn't allow it. I almost gave up - I mean, stepped away from my quest - again. And then, I facepalmed, because once I figured out how to do it, I really, genuinely, felt so silly that it took me this long. That's learning, though, and I really do value the struggle. Without further ado, here is how you, too, can create a clickable image to include in your email signature!
Note that I created four separate images because there are four components to my signature:
In order to link to multiple places, you must have a separate image for each button you plan to create. 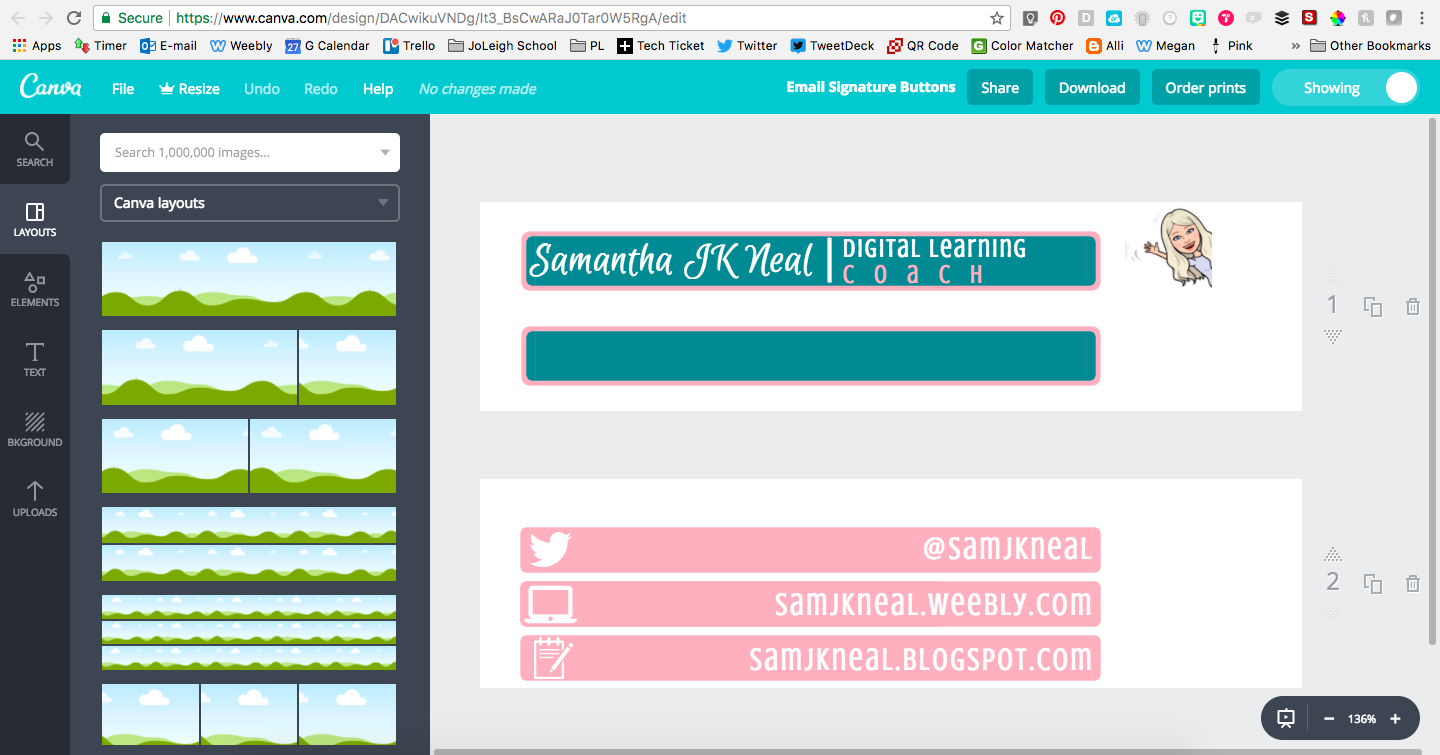 Open Outlook on the web.
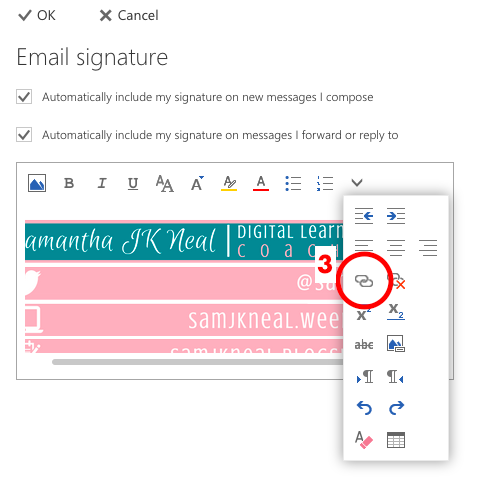
 Add a Link to Your Image
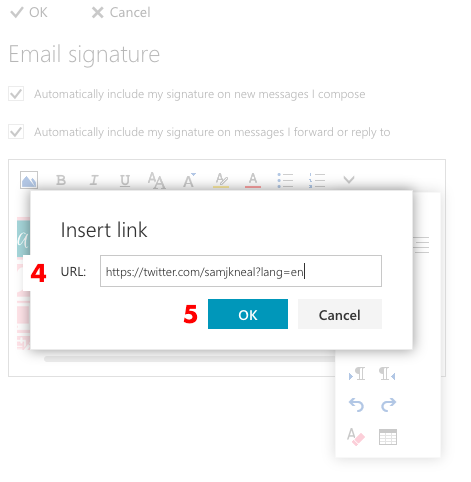
That's it! Seriously! The next time you send an email from Outlook on the web, you will have a beautiful, clickable signature!
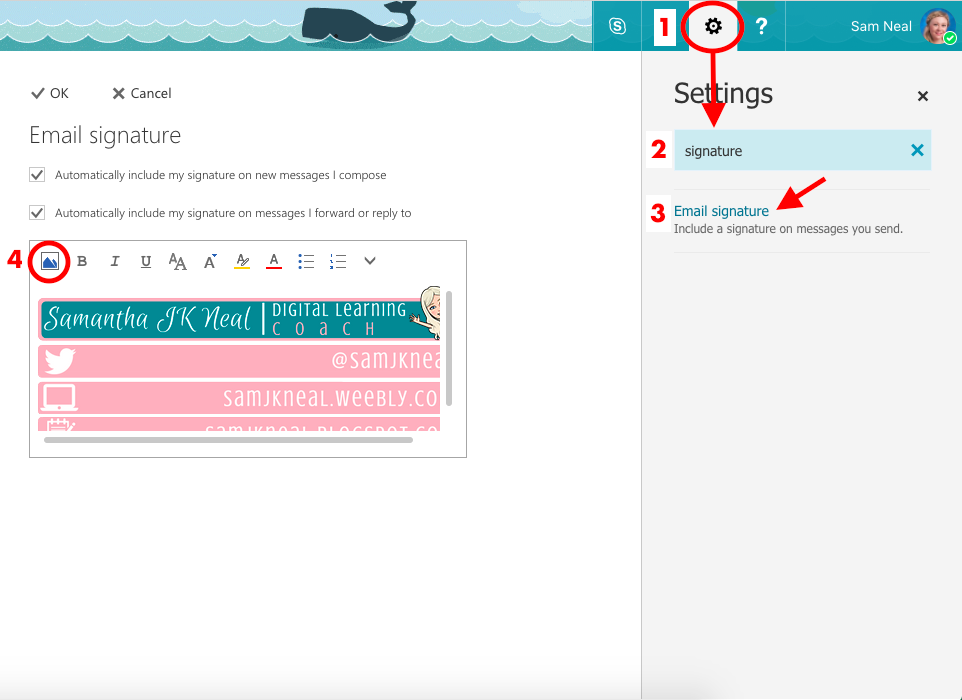
I've already shared my notes from TCEA, but I want to give you more details about some of the things I learned. Over the next few posts, I'll be sharing my top TCEA takeaways, starting with... Calm is a website and app that "brings clarity, joy and peace to your daily life" (Calm.com). It is a tool widely used to enhance mindfulness, aid in sleep, break bad habits, and create good ones. I've used similar free apps in my personal life, but since Calm is a paid service, I hadn't really used it before. At TCEA, I learned that Calm is committed to education - and they offer free premium subscriptions for all K-12 educators! How cool is that?  Why Calm? “If every 8 year old is taught meditation, we will eliminate It's no secret - and probably no surprise - that anxiety is on the rise in the world of education. With high-stakes testing and competition to get into the best undergraduate programs around the country, we're all stressed. And this can absolutely affect the way we perform. The UCLA School Mental Health Project notes that "[t]he overload of activities and demands can cut students off from essential supports, hamper sleep, interfere with learning and development, and affect physical and mental health," and that "[s]chools that do too little to address interpersonal and academic related stressors can expect a great many anxiety-related learning, behavior, and emotional problems" (UCLA School Mental Health Project 2). Calm is something that any educator could use in their classroom in order to equip learners with the tools to decrease anxiety and promote personal and academic success. Since testing season is fast approaching, I can't think of a more perfect time to introduce mindfulness into our classrooms.  How does it work? I reached out to Calm to find out more about how educators currently use the Calm Schools Initiative. Educators typically create their own account, and use the website as an entire class exercise, or log into the app on a handful of devices located in a "quiet corner" for individual use. Learners themselves do not create the account. You could even create a campus-wide account because there is no limit to the number of devices logging into the same account at once. Check out their on-boarding resource to get better acquainted with the app: Here is an on-boarding PDF we've created for teachers as well, to help with introducing mindfulness to classrooms. This is also received once an application has been accepted, but it may be helpful in getting a better understanding of the app: To participate in the program, you and the educators that would like to use Calm just need to fill out our form at (if you want to do this for them, you can :). Once you are approved, the email address used on the application will receive a welcome email with further information on how to get started. To use Calm in the classroom, please make sure you have the following URLs whitelisted in order to ensure the teachers receive their follow up emails from their application: To get started with your FREE premium account, click the button below to fill out the form. You will receive an email once you are approved with further information on how to get started. Once your account has been created, I'd love to hear from you to help get this mindfulness initiative started in your classroom! 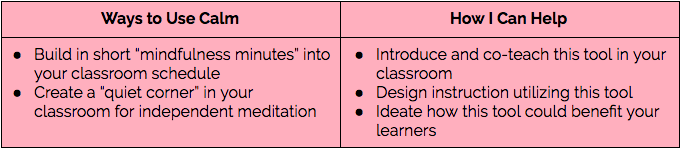 Last week I attended a five-day conference in Austin by Texas Computer Education Association (TCEA), and while there, I challenged myself to do two things:
I'll talk about why I wanted to focus on using my iPad in a later post, so let's get straight to Numbers! Prior to any long conference, I like to set up my notes and plan out my sessions. Conferences like TCEA are huge with a seemingly unlimited number of sessions available at any given moment. The sessions don't all begin at the same time, and they can be located on different floors or even in different buildings. Many sessions have limited seating, so you have to show up early to ensure you get in the door. In short, it can be really overwhelming to go in without a plan - I personally get a lot more out of a big conference when I plan ahead. On Sunday morning before we left, I was ready to start planning. I already had a pretty good idea of the sessions I wanted to hit, so I created a new document in Numbers and got to work. I created a simple table on the first page to note the title, time, and place of each session I planned to attend. And, because I'm as Type A as it gets, I color-coded my cells based on the focus of the session. Note that my original table didn't look like this. There were some sessions I originally planned for that I switched, or in some cases didn't make it into before the seats were filled. I absolutely had to update my table as the week went on, but since it was already built, I found it easy to do a quick update of my landing page throughout the day. 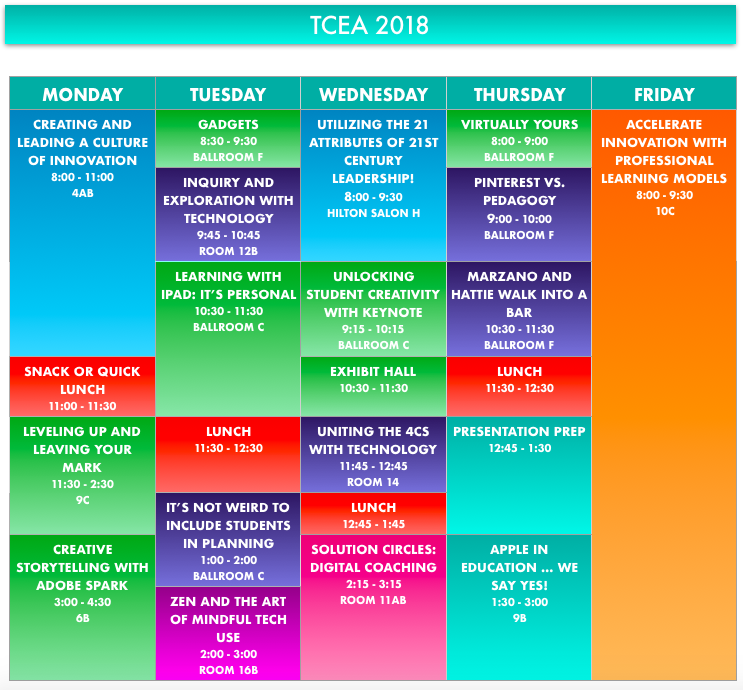 I ended up being really happy I chose to color-code my landing page because I wanted to be sure to attend a variety of sessions, and this gave me an at-a-glance view of what types of workshops I was attending.
After building my landing page, I created another sheet within my document to use as a template for each session I would attend. I included a title bar colored to match the color-coded table, and a text box with placeholders for the presenter's name and a place to link the digital resources for each session. During the sessions I also linked their Twitter handle to their name when available.  Throughout the week, I simply duplicated my template tab for each session. You can see the different sheets on the tabs at the top of a Numbers spreadsheet, which are easy to click through to access the notes from each session. In general, my preferred modality for taking notes is Sketchnoting, which you can read about here. However, there are also times when there's a lot of detailed information that needs to be captured. I would typically do any writing in a Google Doc. However, Numbers allows you to add text boxes to blank white pages, so it was easy to include notes in both modalities. In the note below, I created a checklist in Numbers to write out different definitions of innovation, and also added my sketchnote as an image. (The sketchnote was made in a different app, Paper 53). I love how polished the image looks with a border and drop shadow! 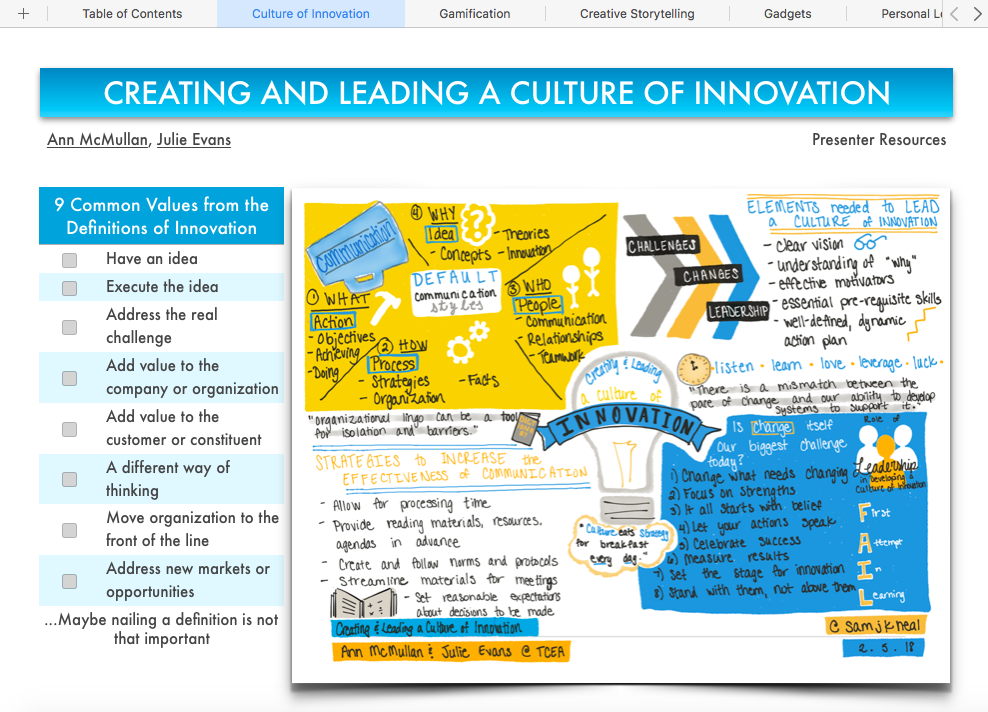 Overall, I was absolutely thrilled that I challenged myself to try something new, and I love how my notes turned out! I think Numbers could be a powerful note-taking tool for learners because you can mix the modalities of note-taking as well as beautifully organize the different notes you're taking. Check out all my notes below!
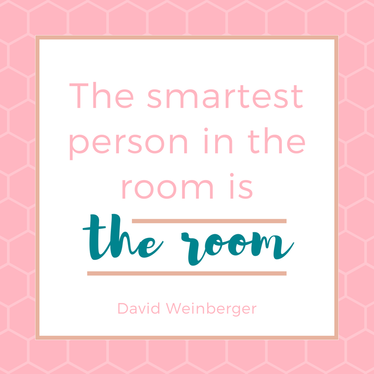
 I’m so excited to be blogging from the TCEA (Texas Computer Education Association) conference in Austin, Texas this week! My team and I will be presenting several different sessions and I am so excited to be co-presenting “Apple in Education, We Say Yes!” on Thursday! 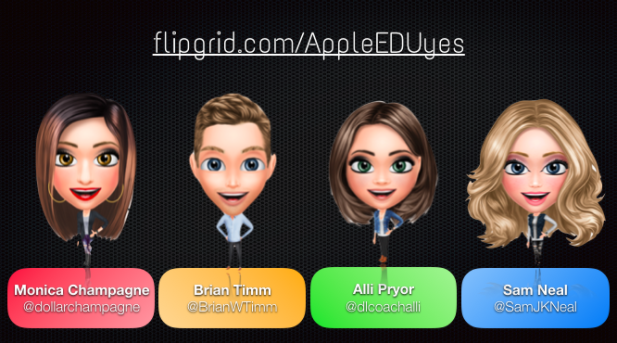 My awesome co-presenters! In our session, we will celebrate the use of Apple in our district and encourage others to see the amazing educational value of Keynote, Pages, Numbers and Everyone Can Code. Even if you are #notattcea, I encourage you to learn with us for this week’s installment of #anappleaweek. Simply go to www.flipgrid.com/AppleEDUyes, select a learning topic and click on the attached resource to begin exploring. Attending TCEA and Interested in more learning from the Coppell DLCs? Check out all of our session offerings below! 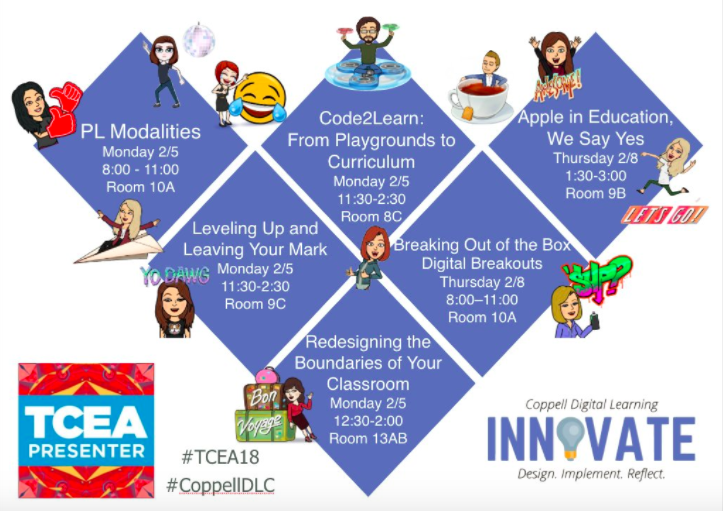 Follow #TCEA and #coppelldlc for more great learning opportunities!  I’m reading Learning First, Technology Second: The Educator’s Guide to Designing Authentic Lessons by Liz Kolb and participating in a weekly #ETCoaches Twitter slow chat to discuss each chapter of the book. Last week I was challenged to identify a phrase or sentence from the reading that struck me. I shared a quote from Punya Mishra and Matthew Koehler:
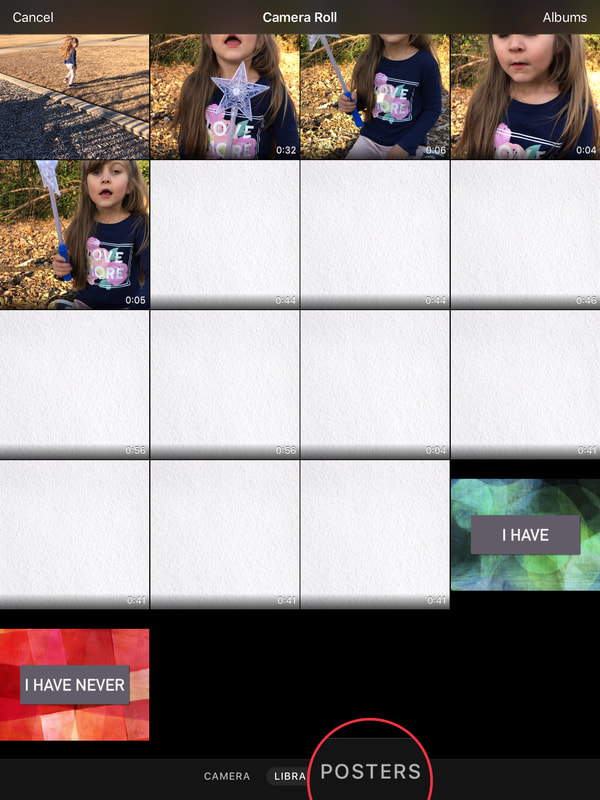
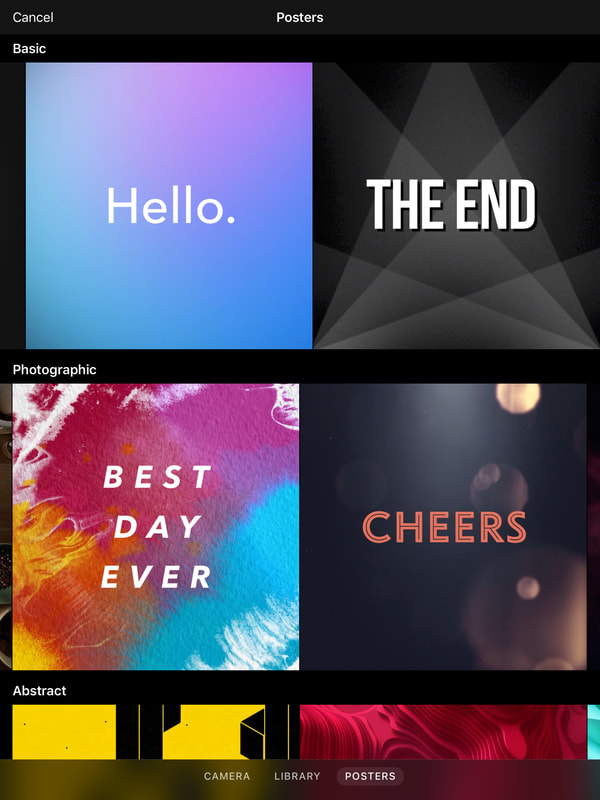
That’s why I avoid “teaching technology” - which may seem counterintuitive for a digital learning coach. However, when you spend time using digital tools with digital natives, it doesn’t take long to see that they don’t really need you to show them which buttons to click - they can figure out a lot of that on their own. What they need is to be guided in reflecting on their thinking and learning processes, creating quality content, and sharing their learning in powerful and appropriate ways. Do we want them to use digital tools? Absolutely! But, as the book title so beautifully reminds us, it’s learning that comes first. One of the reasons that I love Apple products and applications so much is because the tools are easy to use, which means our learners can focus on sharing what they know. Coppell’s Director of Instructional Technology Nancy Garvey says it beautifully: Last week I stumbled upon the perfect opportunity to, as Nancy says, “take how to use something out of the equation.” My five-year-old daughter, who is in kindergarten, brought home her first ever Jump Rope for Heart fundraiser packet. These have been coming to our classrooms and schools across the district over the last couple of weeks, and I’m sure we’re all excited to beg all of our friends and family for money. Jump Rope for Heart is all about raising money for the American Heart Association and instilling lifelong heart-healthy choices in our young learners. JoLeigh was so excited to get her campaign started that we went to the park right away to start filming. I recorded a few clips of JoLeigh playing, and before we went home, we recorded her sharing what she knows about heart disease. That’s when the fun began! I handed JoLeigh my iPad and opened Apple’s newest video editing app, Clips. As she explored what the app has to offer, she quickly discovered the Posters feature, where she could select from beautifully premade animated clips.
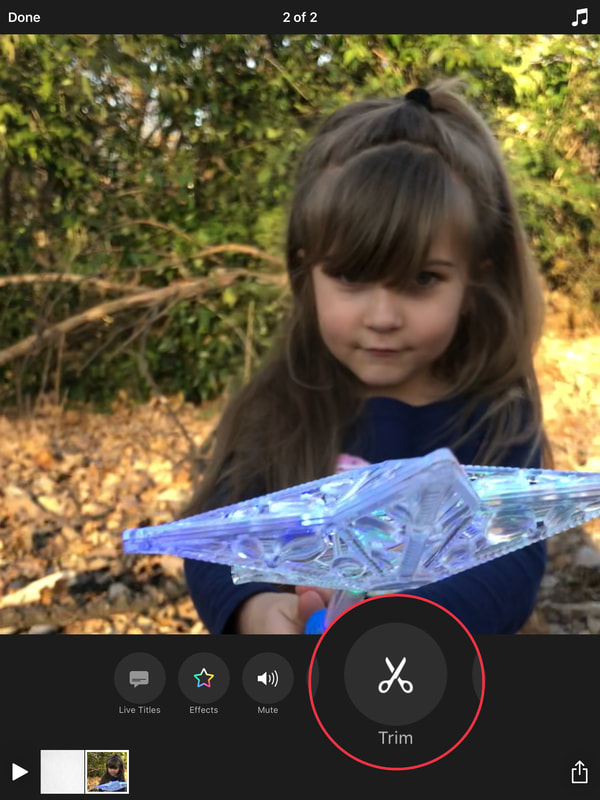
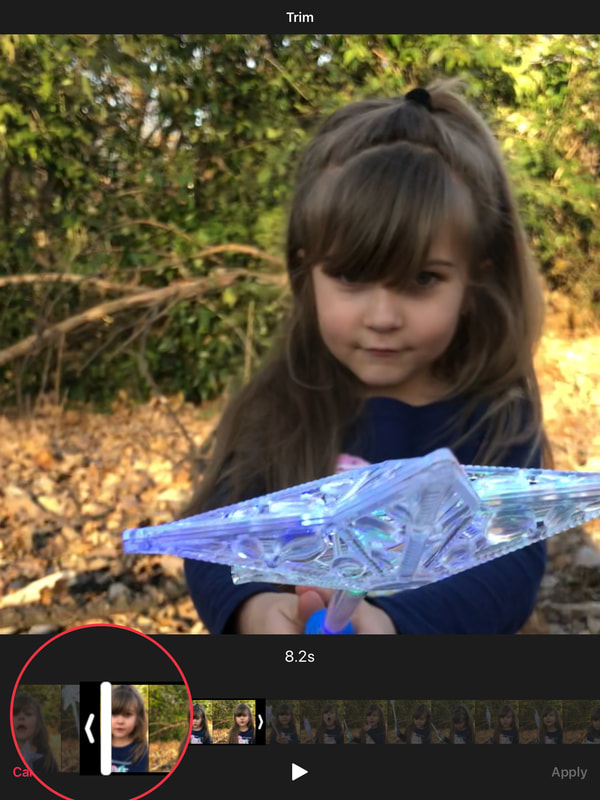
JoLeigh knew right away that she wanted to use the color splash poster, and intuitively knew to select it, then click the red button to record. 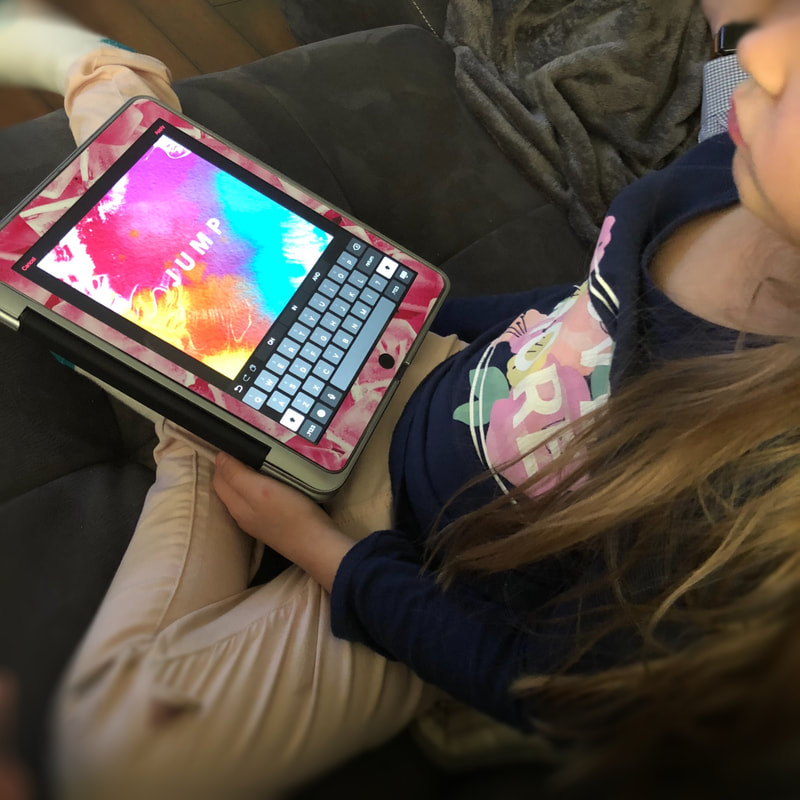 I helped her spell out her title in the text box, and then it was time to select our video clips. This is where I thought she would struggle. We had done several takes of each line because she couldn't remember everything in one take. No big deal - that's why we were using a video editing tool to put it all together. Did I mention I thought she would struggle? I was wrong! JoLeigh figured out - and taught me - two different ways to edit her clips. First she figured out that she could record only what she needed from a given clip. 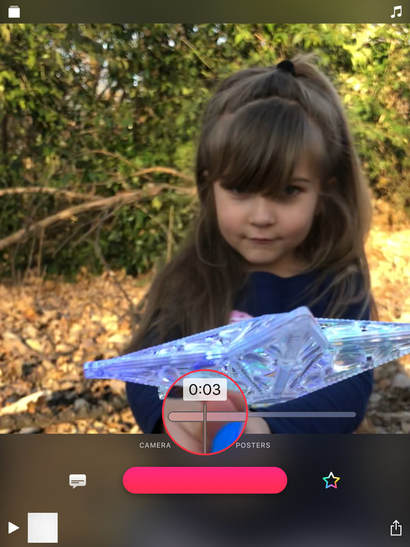 She also found that you can trim a clip even further once you've recorded it. This makes it easy to edit down to just what you need for a quality video.
In addition to trimming your videos, Clips gives you some pretty neat options: you can record live titles, dictating your message while Clips transcribes it into animated captions, put filters on your video, and add fun emojis and cool, customizable stickers. All of these easy-to-use features give your video a professional, polished feel that can be difficult and time-consuming to achieve in other programs. Surprisingly, JoLeigh wasn't interested in those things. She did love, however, that she could mute the videos of her playing at the park and record her voice on top of them. This was a fun way to share tips for living a heart-healthy life while displaying a visual of what an active childhood looks like. JoLeigh's final step was to bring her video to life with background music. Like iMovie, Clips has a fairly large library of free music to use. You can also import songs you already have stored in Apple Music. JoLeigh picked an upbeat song, added one last poster to close out her video, and was ready to share her learning - it really was as easy as 1, 2, 3! JoLeigh is so proud to contribute to the good work the American Heart Association does with Jump Rope for Heart. Check out her final product! What I know as a mom of a kindergartener, a Digital Learning Coach, and a passionate advocate for all learners, is that kids can do anything if we step back and let them. My kindergartner made a product that could probably pass for a commercial. It was important to create a polished, professional-looking marketing tool because this video was published to an authentic audience - everyone we know who might contribute to JoLeigh's fundraiser or even share her video to a larger audience of potential donors. In addition to my love of the ease-of-use in Apple apps such as Clips, it's the ability to create professional-looking products that takes these apps to the next level. We want our learners to be contributors to the world, and what better way to do that than to give them tools to truly engage an authentic audience? A few months ago, JoLeigh got to be part of the authentic audience for a group of 7th grade scientists in Jodie Deinhammer's class. JoLeigh and her classmates submitted questions to the 7th graders on Flipgrid, and then the 7th graders participated in labs in order to answer the questions. Jodie's class answered JoLeigh's question via a polished video made in Clips. JoLeigh got to watch different parts of the experiment while listening to the 7th graders explain their experiment and the conclusions they drew. They used the different tools in Clips, such as stickers, to help JoLeigh understand that insects' behavior is influenced by their food source. Check out this amazing connection!
Want to know more about how Apple empowers learners to engage in the world around them? Check out the DLC blog series! How have you used Clips in your classroom? Share in the comments below! Did you ever consider that a spreadsheet could be more than, well, a spreadsheet? DLC Alli Pryor shares how the app Numbers transform data into beautiful visuals and beyond!  Thinking Maps are a wonderful way to help learners organize and visualize their thinking, so I'm excited to share a Keynote template with Thinking Maps for learners to manipulate on their own or to collaborate on from their individual devices.
My friend and teammate Kelly Skillingberg created the template, which you can use or share, below! Note: Open link on an iPad or Mac, tap download to view the file. |

 RSS Feed