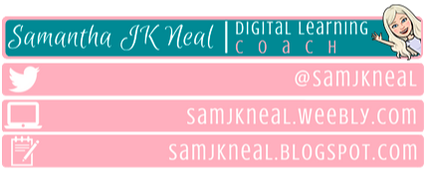
 Sometimes I feel like I spend a lot more time trying to figure something out than is really necessary - I Google, I read, I seek help, I attempt, and sometimes end up unsuccessful and frustrated. That's how I was feeling last night when I finally - finally - figured out how to make an image "clickable" in my Outlook email signature. (By clickable, I mean that if someone were to receive an email from me and click the image, it would take them to a link I have provided.) Why did this ever matter to me? For one thing, adding the image as part of or as your email signature looks beautiful and polished. For another, it's functional! Both versions of my email signature, pictured below, link to my Twitter profile, website, and blog.
Over the summer I spent time trying to figure out how to create a beautiful, clickable email signature, and after a lot of frustration, stepped away from my quest. I came back to my quest with a vengeance, however, when I got an email yesterday that had - yes, you guessed it! - a clickable image in the signature! Could I have simply replied to this email to ask how this magic was accomplished? Yes! Did I do that? No! I was determined to figure it out on my own. I did more Googling. I read some really techy articles that I didn't understand. I figured out that I couldn't even do the techy things that were being suggested because my access level doesn't allow it. I almost gave up - I mean, stepped away from my quest - again. And then, I facepalmed, because once I figured out how to do it, I really, genuinely, felt so silly that it took me this long. That's learning, though, and I really do value the struggle. Without further ado, here is how you, too, can create a clickable image to include in your email signature!
Note that I created four separate images because there are four components to my signature:
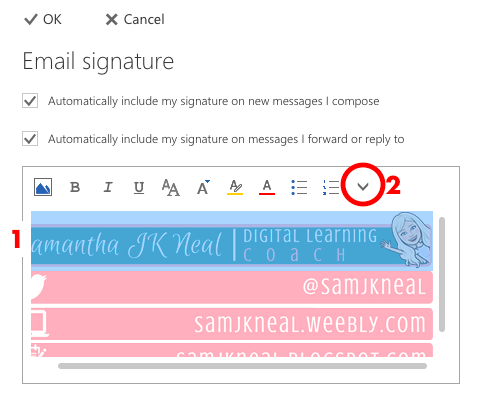
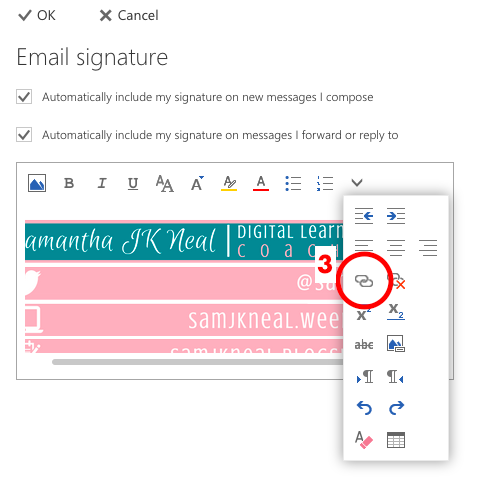
In order to link to multiple places, you must have a separate image for each button you plan to create. 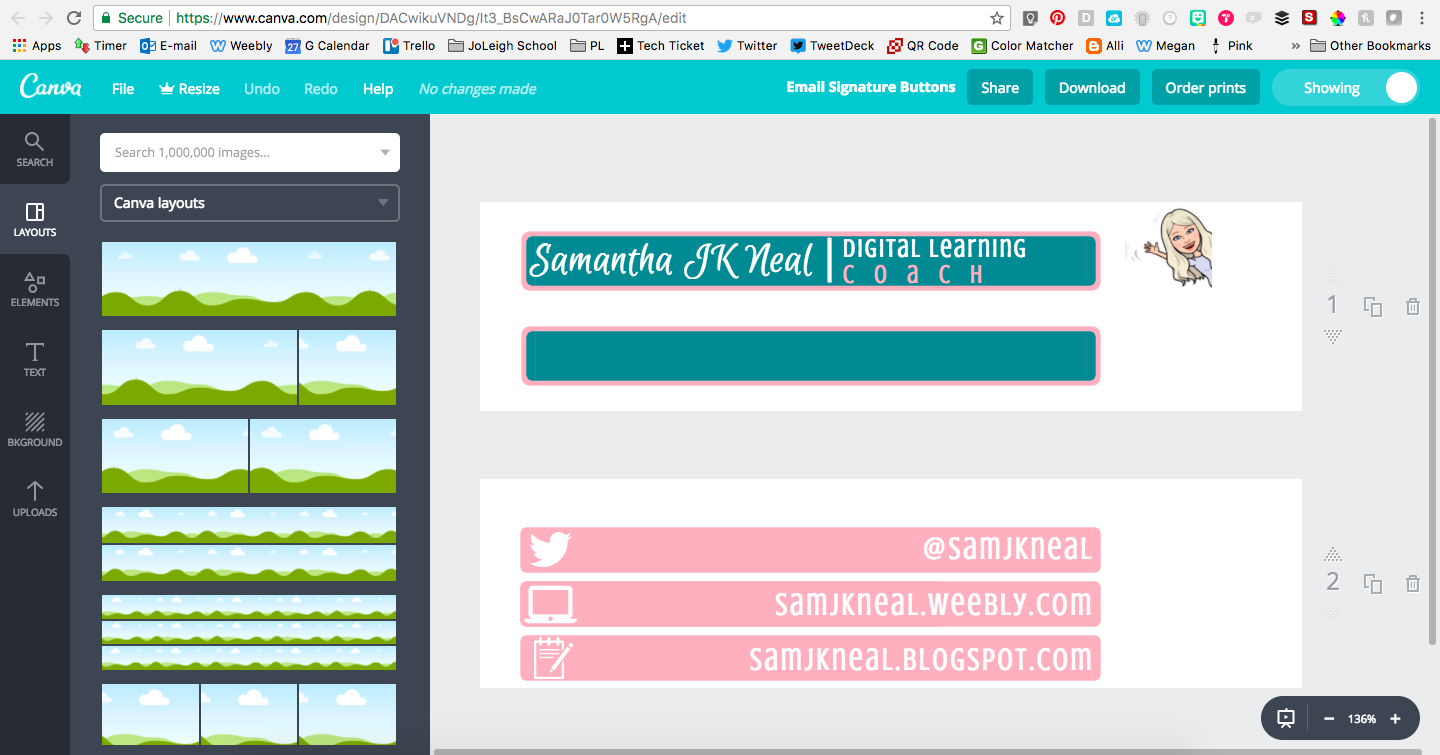 Open Outlook on the web.
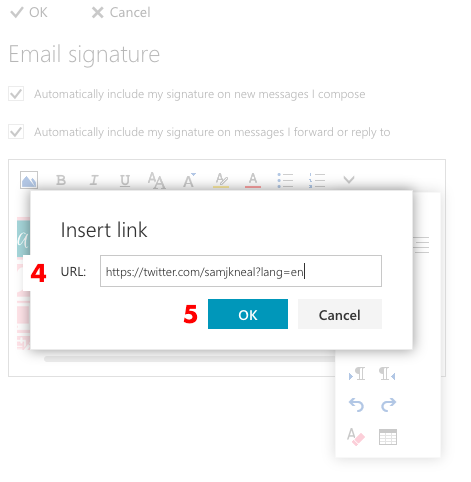
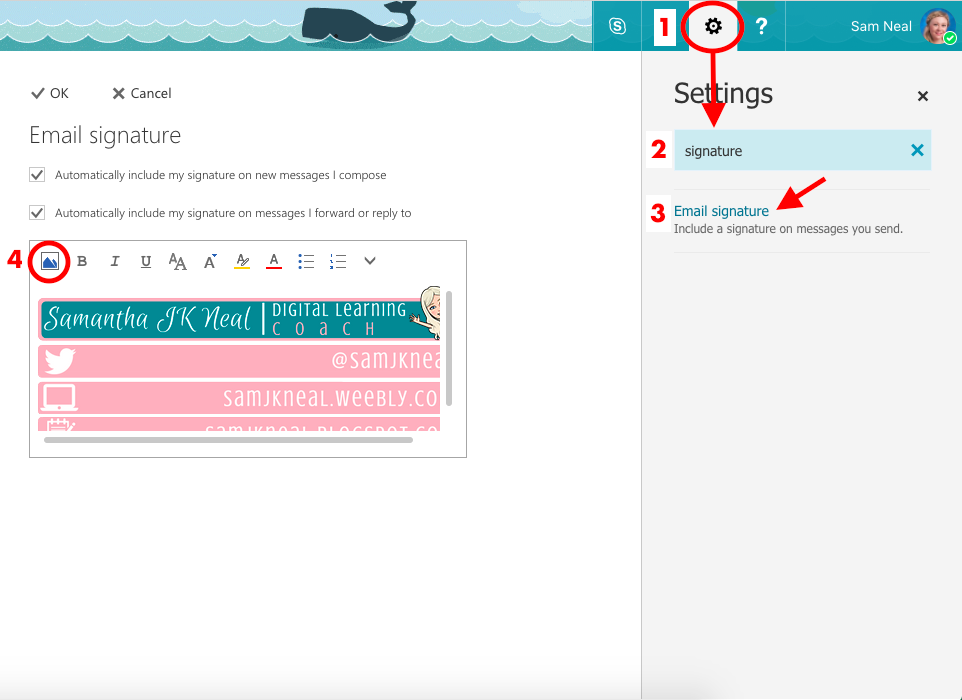 Add a Link to Your Image
That's it! Seriously! The next time you send an email from Outlook on the web, you will have a beautiful, clickable signature!
4 Comments
I've already shared my notes from TCEA, but I want to give you more details about some of the things I learned. Over the next few posts, I'll be sharing my top TCEA takeaways, starting with... Calm is a website and app that "brings clarity, joy and peace to your daily life" (Calm.com). It is a tool widely used to enhance mindfulness, aid in sleep, break bad habits, and create good ones. I've used similar free apps in my personal life, but since Calm is a paid service, I hadn't really used it before. At TCEA, I learned that Calm is committed to education - and they offer free premium subscriptions for all K-12 educators! How cool is that? 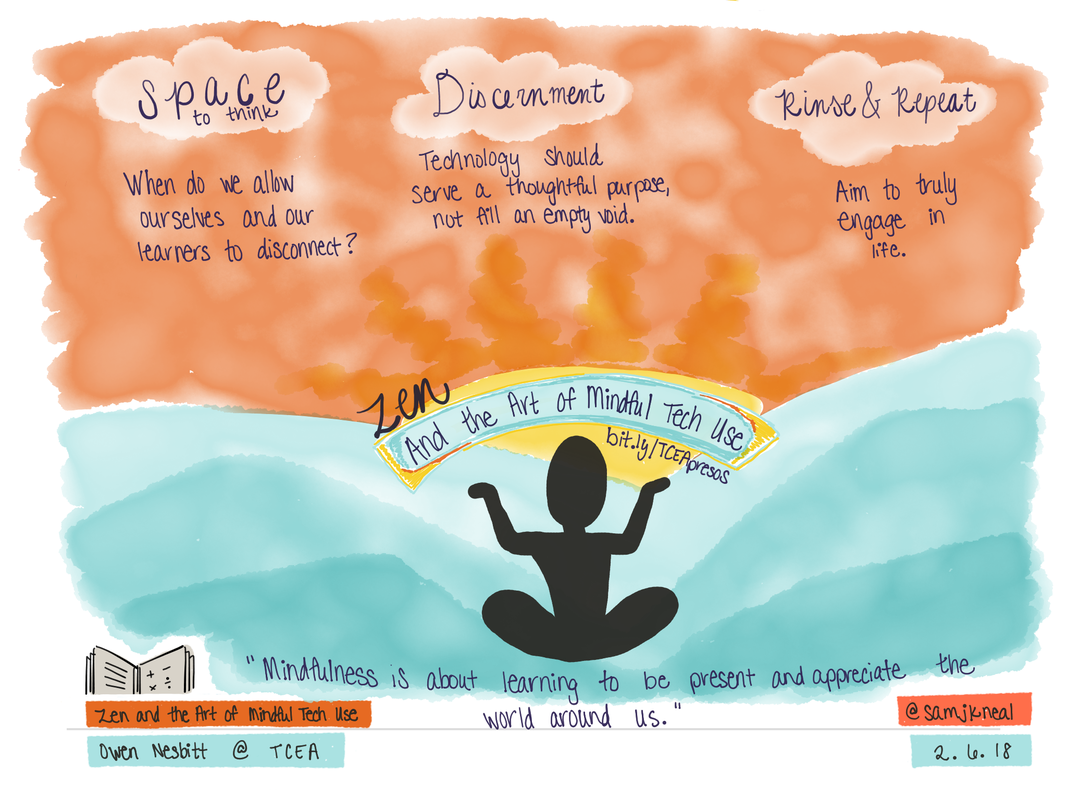 Why Calm? “If every 8 year old is taught meditation, we will eliminate It's no secret - and probably no surprise - that anxiety is on the rise in the world of education. With high-stakes testing and competition to get into the best undergraduate programs around the country, we're all stressed. And this can absolutely affect the way we perform. The UCLA School Mental Health Project notes that "[t]he overload of activities and demands can cut students off from essential supports, hamper sleep, interfere with learning and development, and affect physical and mental health," and that "[s]chools that do too little to address interpersonal and academic related stressors can expect a great many anxiety-related learning, behavior, and emotional problems" (UCLA School Mental Health Project 2). Calm is something that any educator could use in their classroom in order to equip learners with the tools to decrease anxiety and promote personal and academic success. Since testing season is fast approaching, I can't think of a more perfect time to introduce mindfulness into our classrooms.  How does it work? I reached out to Calm to find out more about how educators currently use the Calm Schools Initiative. Educators typically create their own account, and use the website as an entire class exercise, or log into the app on a handful of devices located in a "quiet corner" for individual use. Learners themselves do not create the account. You could even create a campus-wide account because there is no limit to the number of devices logging into the same account at once. Check out their on-boarding resource to get better acquainted with the app: Here is an on-boarding PDF we've created for teachers as well, to help with introducing mindfulness to classrooms. This is also received once an application has been accepted, but it may be helpful in getting a better understanding of the app: To participate in the program, you and the educators that would like to use Calm just need to fill out our form at (if you want to do this for them, you can :). Once you are approved, the email address used on the application will receive a welcome email with further information on how to get started. To use Calm in the classroom, please make sure you have the following URLs whitelisted in order to ensure the teachers receive their follow up emails from their application: To get started with your FREE premium account, click the button below to fill out the form. You will receive an email once you are approved with further information on how to get started. Once your account has been created, I'd love to hear from you to help get this mindfulness initiative started in your classroom! 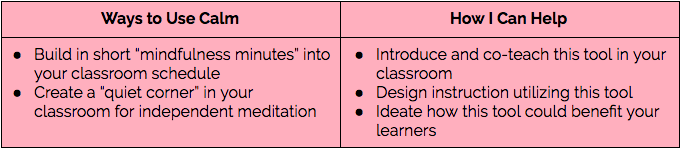 Last week I attended a five-day conference in Austin by Texas Computer Education Association (TCEA), and while there, I challenged myself to do two things:
I'll talk about why I wanted to focus on using my iPad in a later post, so let's get straight to Numbers! Prior to any long conference, I like to set up my notes and plan out my sessions. Conferences like TCEA are huge with a seemingly unlimited number of sessions available at any given moment. The sessions don't all begin at the same time, and they can be located on different floors or even in different buildings. Many sessions have limited seating, so you have to show up early to ensure you get in the door. In short, it can be really overwhelming to go in without a plan - I personally get a lot more out of a big conference when I plan ahead. On Sunday morning before we left, I was ready to start planning. I already had a pretty good idea of the sessions I wanted to hit, so I created a new document in Numbers and got to work. I created a simple table on the first page to note the title, time, and place of each session I planned to attend. And, because I'm as Type A as it gets, I color-coded my cells based on the focus of the session. Note that my original table didn't look like this. There were some sessions I originally planned for that I switched, or in some cases didn't make it into before the seats were filled. I absolutely had to update my table as the week went on, but since it was already built, I found it easy to do a quick update of my landing page throughout the day. 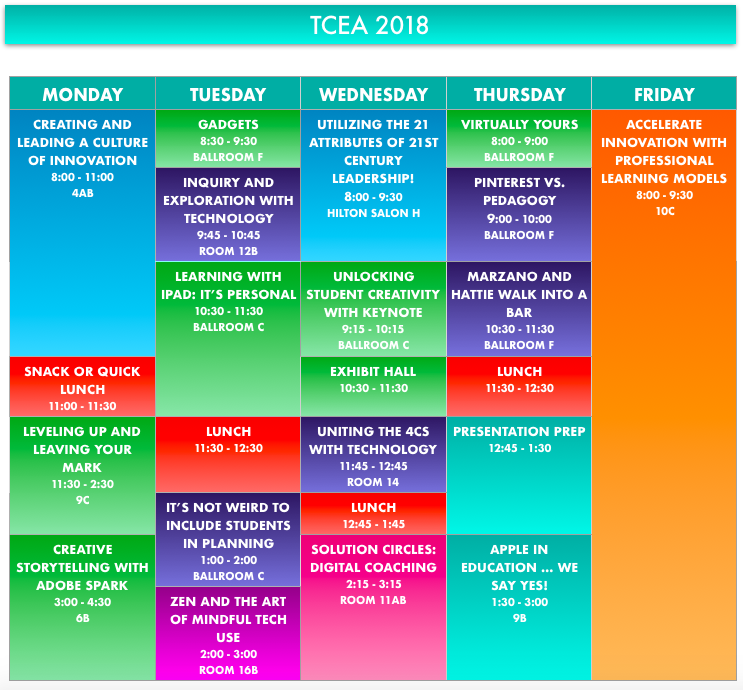 I ended up being really happy I chose to color-code my landing page because I wanted to be sure to attend a variety of sessions, and this gave me an at-a-glance view of what types of workshops I was attending.
After building my landing page, I created another sheet within my document to use as a template for each session I would attend. I included a title bar colored to match the color-coded table, and a text box with placeholders for the presenter's name and a place to link the digital resources for each session. During the sessions I also linked their Twitter handle to their name when available.  Throughout the week, I simply duplicated my template tab for each session. You can see the different sheets on the tabs at the top of a Numbers spreadsheet, which are easy to click through to access the notes from each session. In general, my preferred modality for taking notes is Sketchnoting, which you can read about here. However, there are also times when there's a lot of detailed information that needs to be captured. I would typically do any writing in a Google Doc. However, Numbers allows you to add text boxes to blank white pages, so it was easy to include notes in both modalities. In the note below, I created a checklist in Numbers to write out different definitions of innovation, and also added my sketchnote as an image. (The sketchnote was made in a different app, Paper 53). I love how polished the image looks with a border and drop shadow! 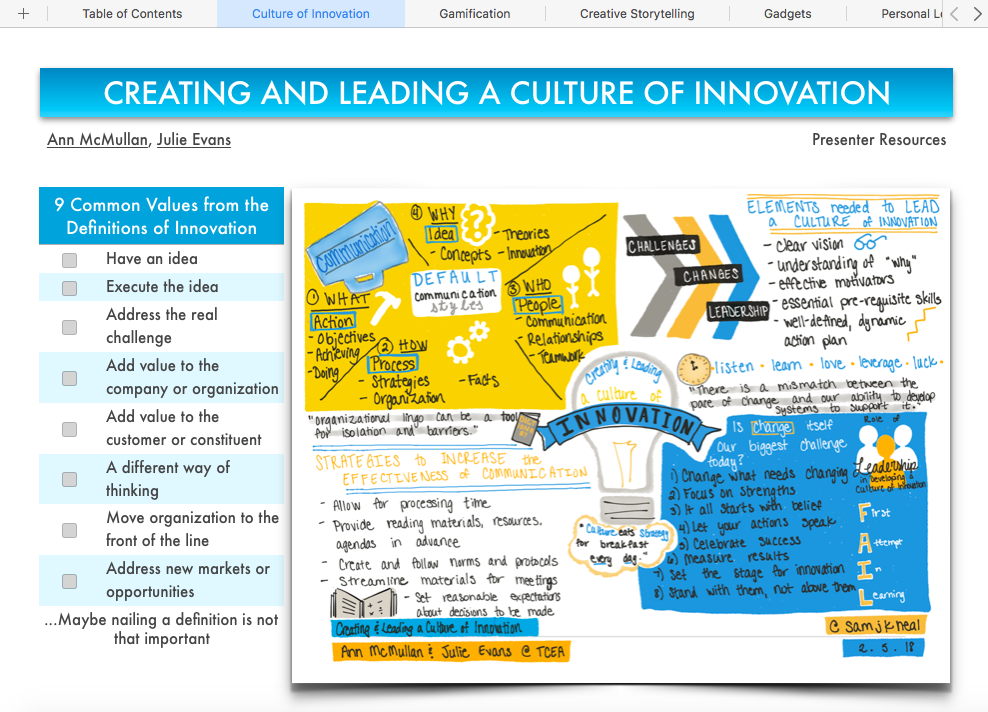 Overall, I was absolutely thrilled that I challenged myself to try something new, and I love how my notes turned out! I think Numbers could be a powerful note-taking tool for learners because you can mix the modalities of note-taking as well as beautifully organize the different notes you're taking. Check out all my notes below!
 I’m so excited to be blogging from the TCEA (Texas Computer Education Association) conference in Austin, Texas this week! My team and I will be presenting several different sessions and I am so excited to be co-presenting “Apple in Education, We Say Yes!” on Thursday! 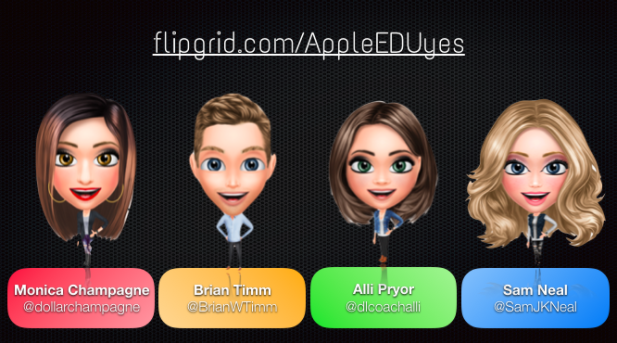 My awesome co-presenters! In our session, we will celebrate the use of Apple in our district and encourage others to see the amazing educational value of Keynote, Pages, Numbers and Everyone Can Code. Even if you are #notattcea, I encourage you to learn with us for this week’s installment of #anappleaweek. Simply go to www.flipgrid.com/AppleEDUyes, select a learning topic and click on the attached resource to begin exploring. Attending TCEA and Interested in more learning from the Coppell DLCs? Check out all of our session offerings below! 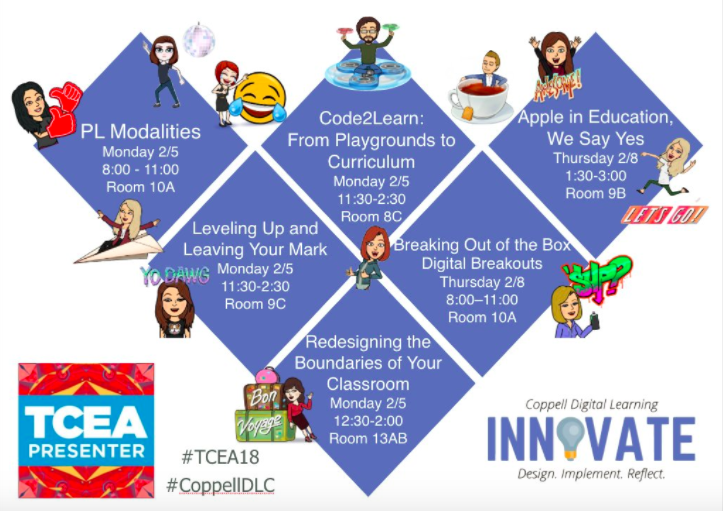 Follow #TCEA and #coppelldlc for more great learning opportunities! |


 RSS Feed