|
Two years ago, I was building a new reflection unit for my sophomores, and I really wanted them to walk away with an understanding of the best modality of reflection for them, so we spent a class exploring written, verbal, and visual reflection. You can preview the ports here. Since my preferred modality for reflection is writing, I didn’t have any experience with visual reflection. I reached out to the Director of Mathematics in my district, Mary Kemper, who just so happens to be a sketchnote pro. And because she loves being in the classroom whenever she can, she offered to stop by one of my classes and spend a few minutes giving us a sketchnote workshop. Mrs. Kemper helped us to understand several key things about sketchnoting, and gave us some great tips to get started. 1. Get Organized One way to really simplify your sketchnoting is to develop an organizational structure that works for you. If you happen to have the outline or notes for a presentation from the beginning, it's easy to plan your sketch accordingly. Three main points turn into three-columns in your notes. Six points become three sections on top, three on bottom. I use a template for my notes that is helpful in reminding me to make note of where my information is coming from in case I want to reference that presentation or presenter later. The template came from my favorite app to use, Paper 53, although I've modified it a bit to suit my notes better. I like to include space for:
 I also tend to include the title of my presentation in the center of the page, with all of the details surrounding it. This works well, particularly in those instances where I don't have the outline of the presentation ahead of time. 2. Practice in a Low-Risk Environment The first time I tried to sketchnote, I was so focused on the drawings themselves that I realized I wasn't actually paying attention to what I was supposed to be learning, which pretty much defeats the purpose. Instead of trying to learn to sketchnote while learning, I started sketchnoting while I was at home watching Netflix. I would make a storyboard of whatever I was watching. It allowed me the opportunity to practice writing notes without the stress of missing information. If you want to try sketchnoting, I highly recommend you practice first! When the time comes for you to make notes as you're learning, you'll be be more efficient and better able to focus on the presentation and take great notes! 3. Don't Sweat the TechniqueWant to know a little secret about sketchnoting? You don't have to be an artist to create artistic notes! Really, you don't! Part of the reason I use the app Paper 53 when I sketchnote is because it makes my notes look more artistic than they really are. Paper 53 allows you different ways to draw, such as:
This summer, Mrs. Kemper shared that a lot of people ask her how her handwriting is so neat when she sketchnotes. She shared a really cool video using Apple Clips that shows you how to zoom in and out to make your text nice and neat. Be sure to check it out! I also remember her telling us in the workshop that she has developed some "stock" sketches that she uses frequently, like people, trees, etc. When you start to see the kind of doodles you use frequently, it becomes easier and quicker to draw them, so I recommend thinking about what images, patterns, and shapes you visualize frequently. 4. Remember Your PurposeThe point of sketchnoting, like any form of note taking, is to help you remember what you learned. It's not really about how pretty it is - although that is one reason it's fun to do. However, if you find that you're consumed with drawing the perfect images and not really what the images represent, you might be missing things. When I sit down to take notes, whether it be during a presentation at a conference or simply as a reflection on something else, such as a Podcast I've listened to, I think about what modality will best serve my learning. Typically, a keynote address or speech is really meant to inspire. They are full of stories, but not necessarily the "nitty gritty." I like to sketchnote for this type of presentation because I can so easily connect my drawings to the stories that inspired me. This is the first sketchnote I did while watching a keynote address: 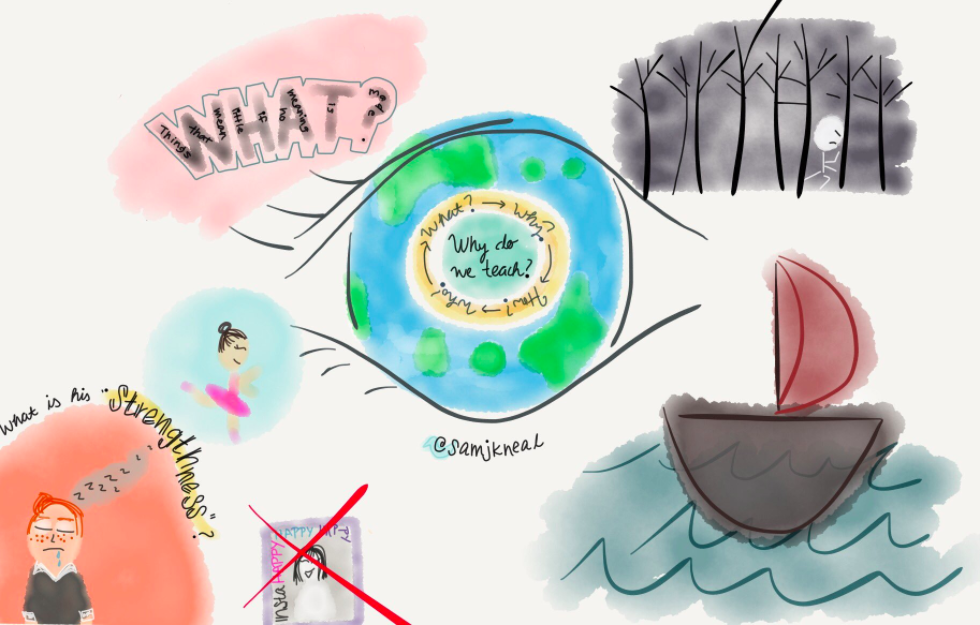 I didn't have a great organizational structure in place at that time, so I failed to identify the speaker and, I'm sorry to say, I can't remember who it was. But I can tell you that the dark forest in the top corner represents a story he told about his experience in education. He shared that, in school, he often felt like he was lost in a dark forest. His educational experience left him feeling alone and unsupported, with no direction for where to go or how to get there. I remember being deeply saddened by his story, and wondering how many of my own learners felt that way. I thought a lot about how to identify those learners and how to ensure I was a guiding light in their dark forest. And that is the power of sketchnoting for me. It's the immediate connection I can make to a powerful moment in a learning experience. It's walking away from a learning experience not with just a what and a how, but with the most important thing - the why. 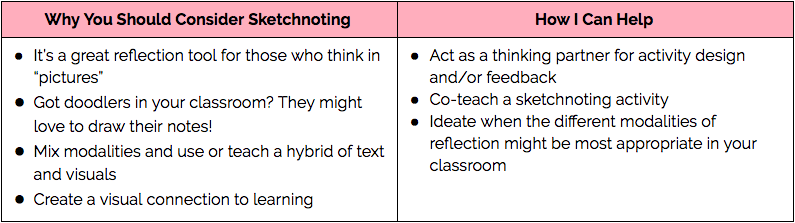 Are you thinking of trying sketchnoting, or thinking about how it could help your learners make and retain meaning?
I'd love to hear from you! Share in the comments!
0 Comments
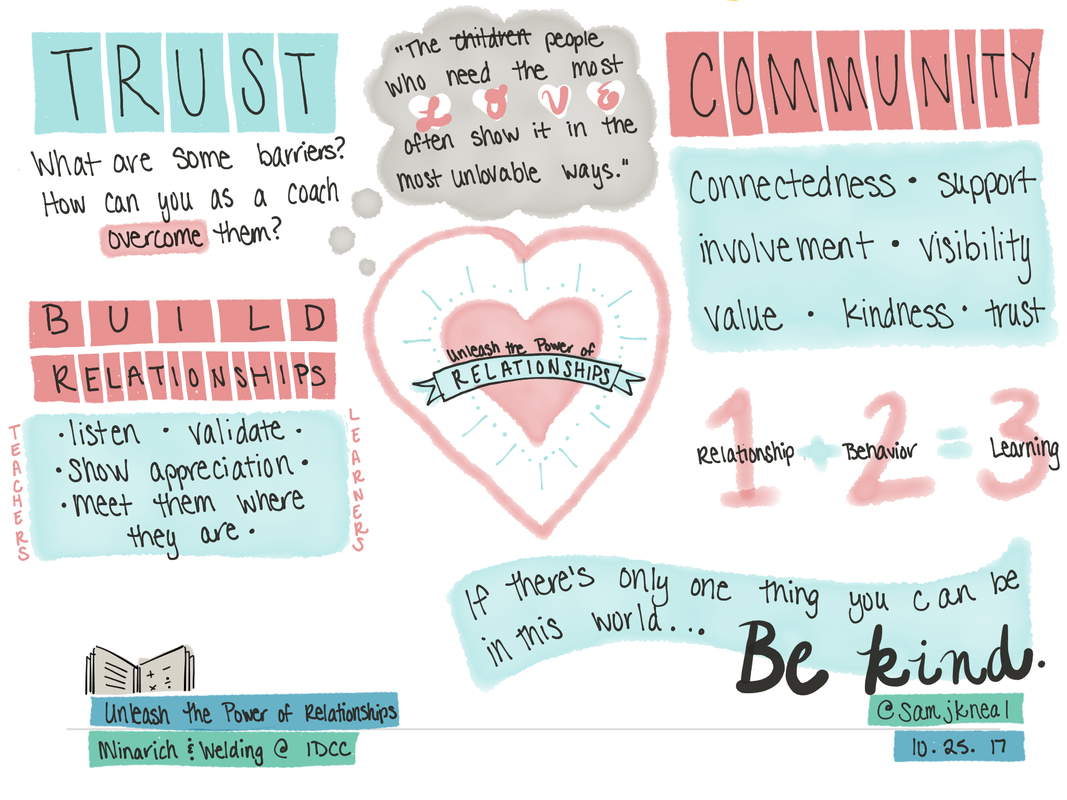
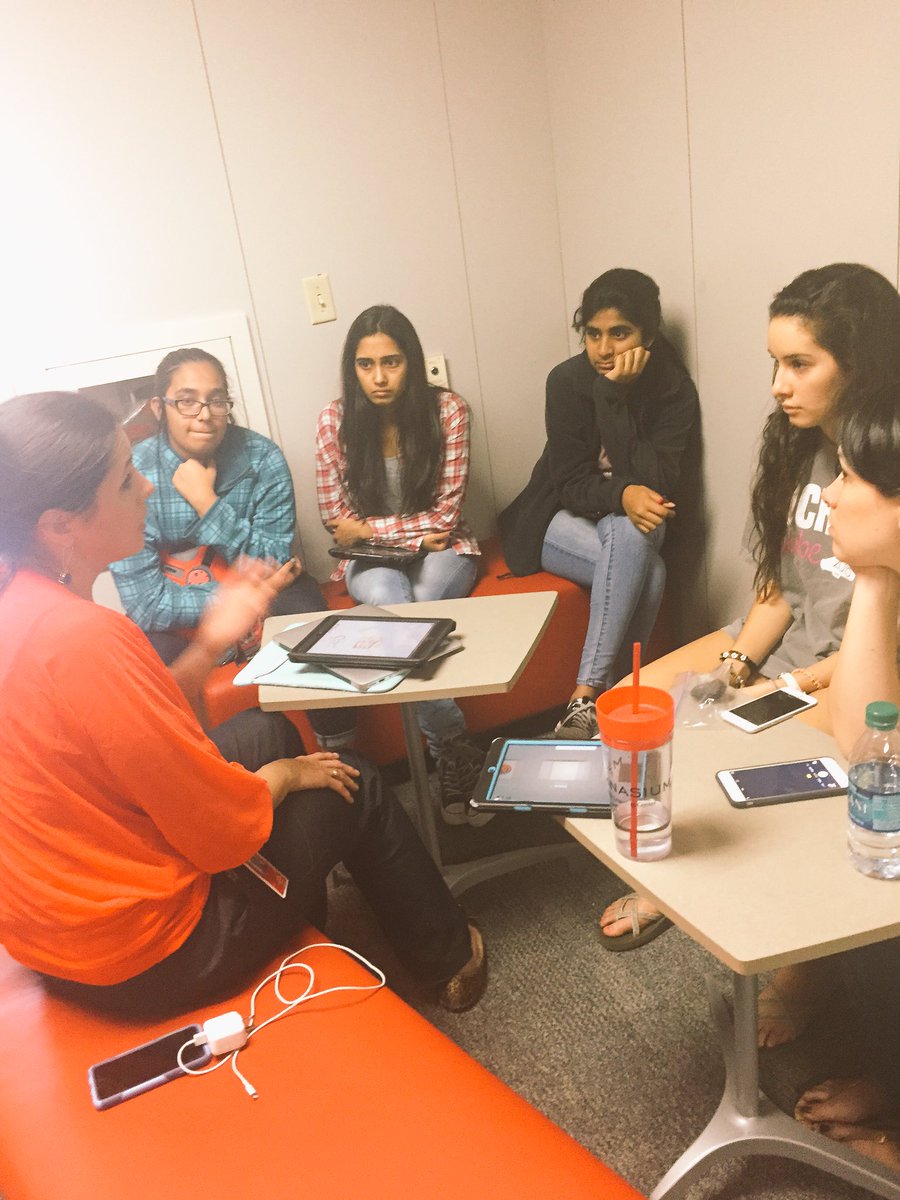
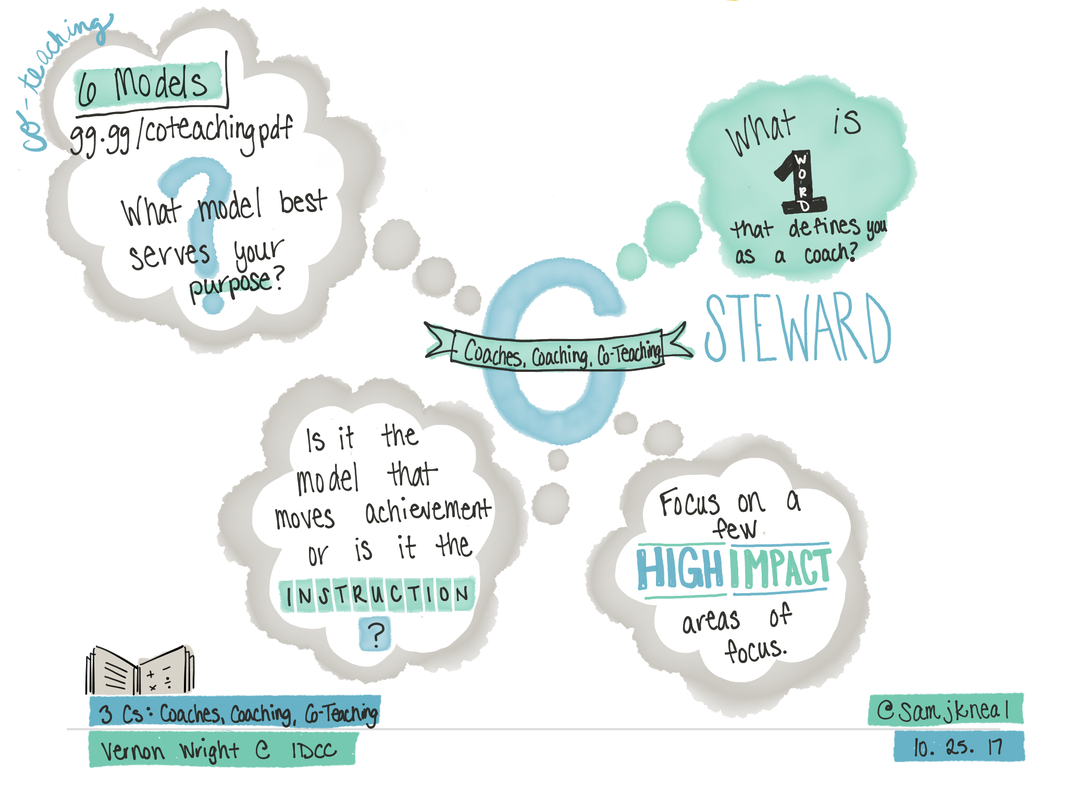
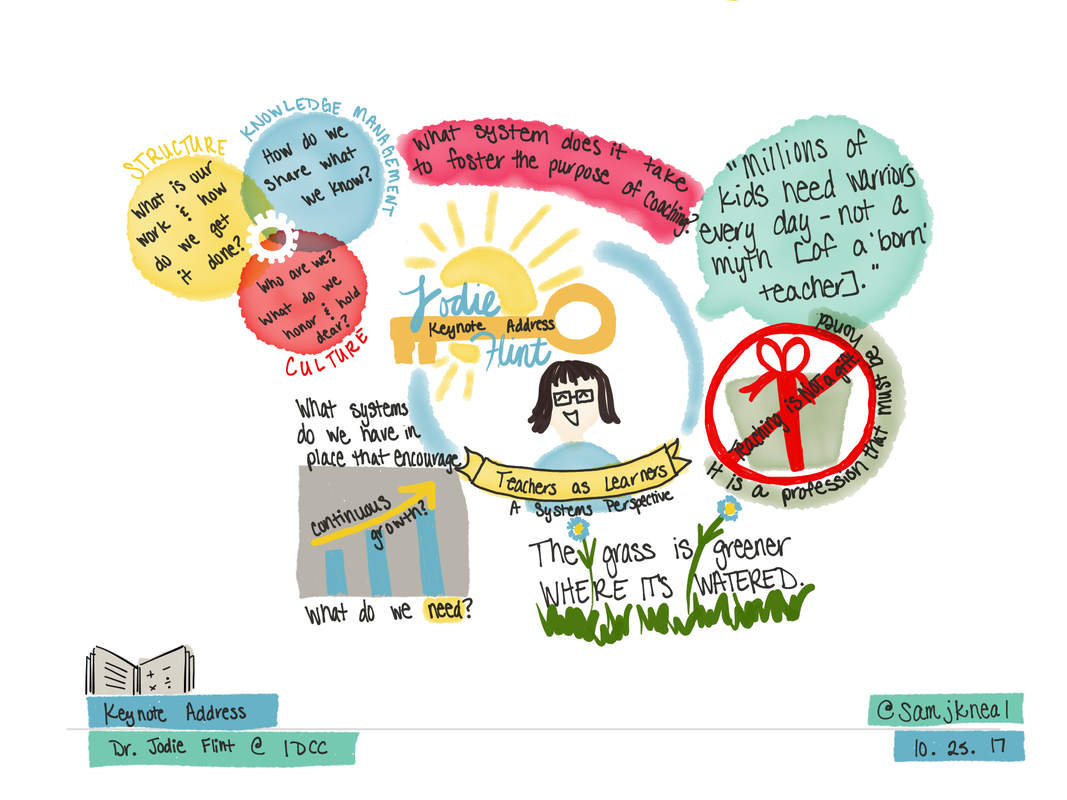
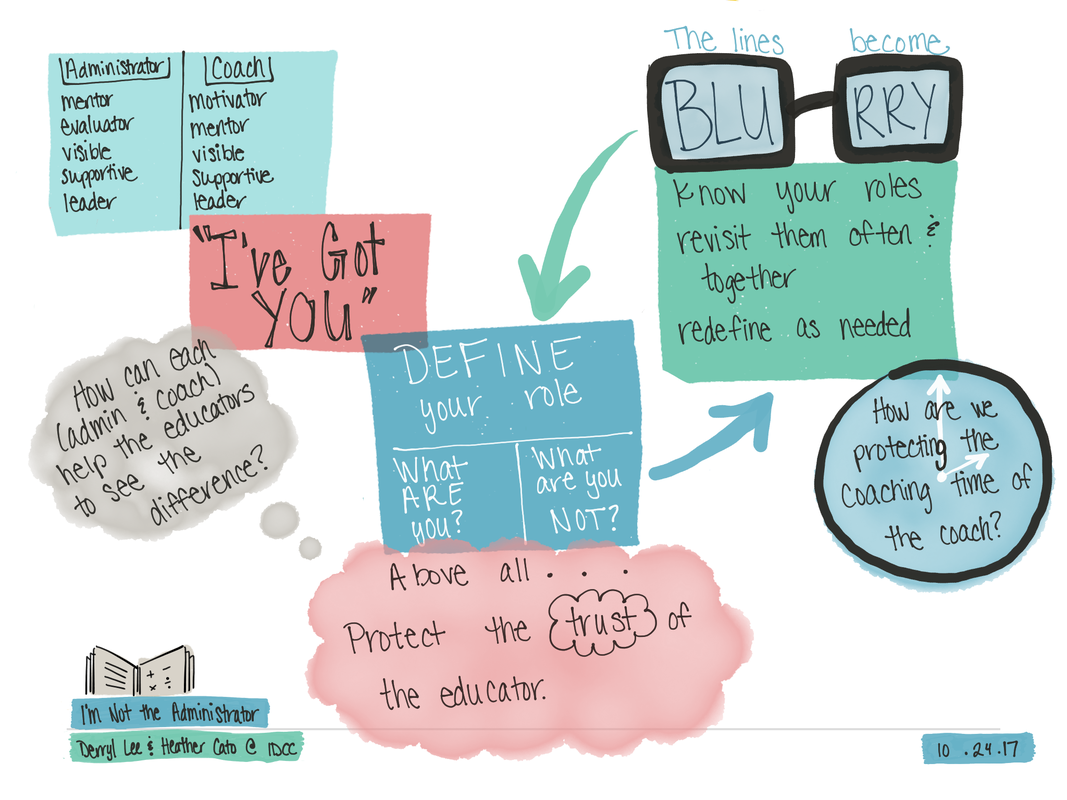
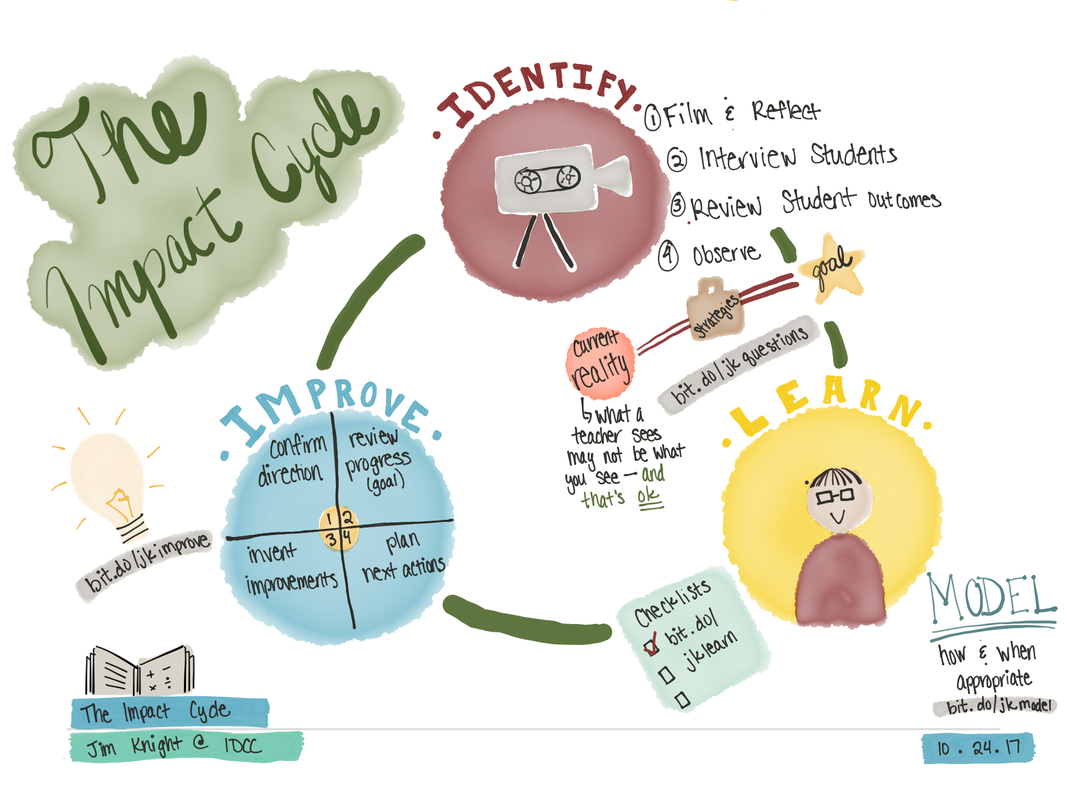
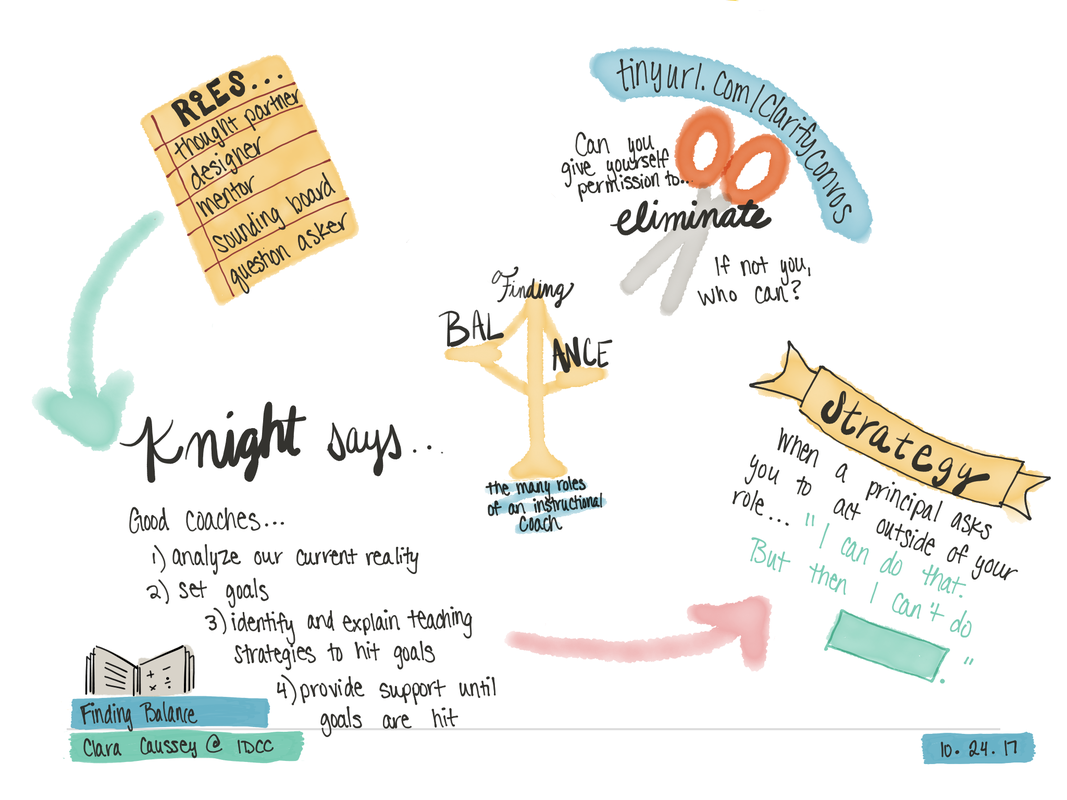
This week I had the privilege of attending Instructional and Digital Coaching Conference (IDCC) in Frisco, TX. It was a very powerful two days of learning and sharing and gaining of perspective, and I thoroughly enjoyed hearing from seasoned and new (like me!) coaches. Today's post will be short, but I just wanted to share a few resources with anyone who may be interested in the learning that took place. On the Table of Contents below, you can take a look at the notes taken and curated by two of my teammates and me. Not a coach? That's ok! I think there are plenty of takeaways about relationships, trust, and instructional strategies that would benefit anyone in education. Additionally, I want to share a couple of the sketchnotes I made. In an upcoming post, I will share some strategies that help make sketchnoting a powerful learning and reflection tool for me.  I'd love to hear from you! What did you take away from the resources I've shared? Share in the comments!
Each week, I have been working with two learners from each class (for a total of 8). I work with the same group for two weeks in a row, and then meet a new group. The process has been very organic, and we are definitely learning as we go! So far, we have structured our time as follows: Week One: Learn to Teach
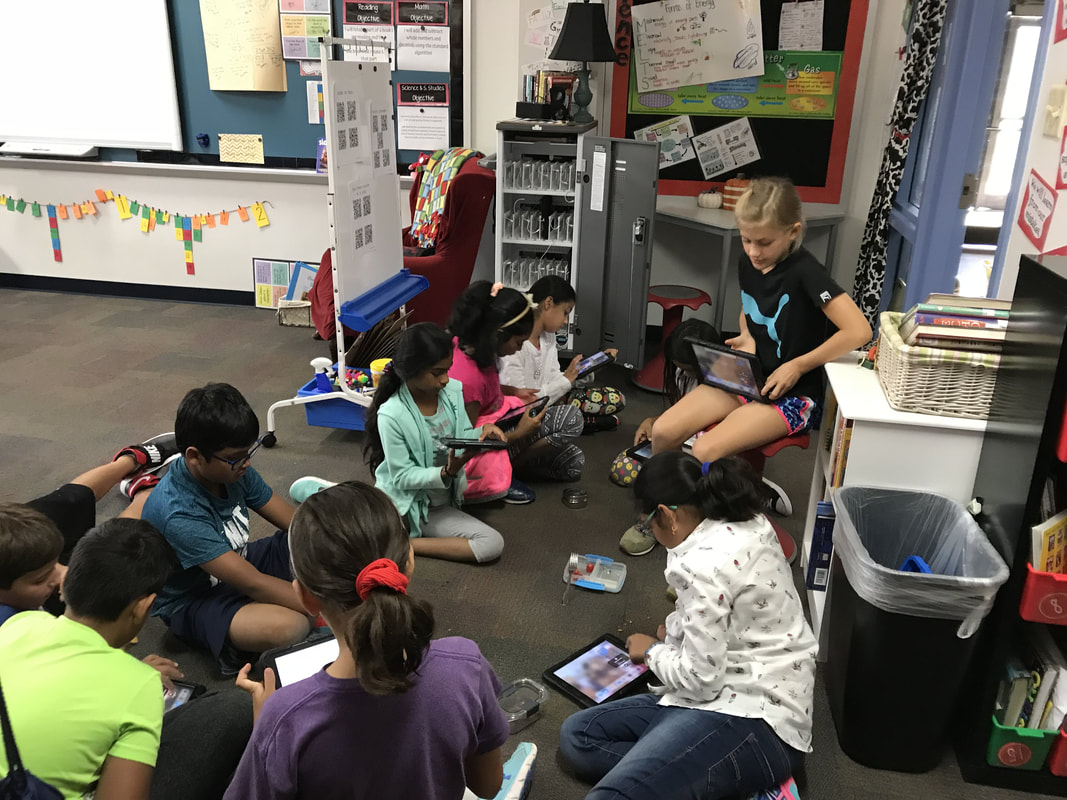
Not too long after I returned my group to their classes, I got these pictures of two of my friends teaching their class how to screen record! (I am living the dream, people!) Week Two: Show What You Know
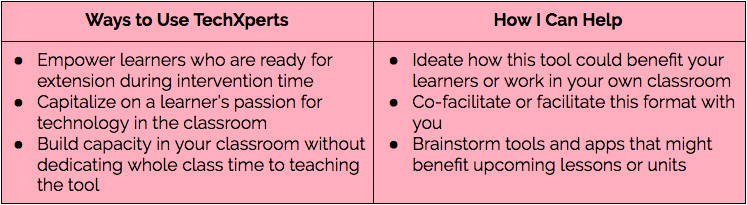
I'd love to hear from you! How do you empower your learners to become experts in the room? Share in the comments! Last month, Apple released the highly anticipated iOS11. I don't know about you, but for me, this update delivered! I was mostly excited that iOS11 would allow iPad users to screencast - what a game-changer for educators and learners! My friend and fellow DLC Alli has been sharing some of the great new features of iOS11, and I want to share her learning with you as well as contribute something of my own. Photo MarkUp on iOS11
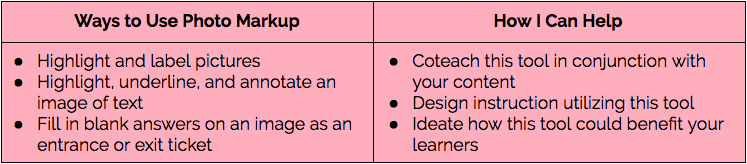 I can't wait to hear how you are going to use the Markup feature in your classrooms. Share in the comments! In my last post, I gave you some tools to help you manage your Twitterverse. Now that you’ve learned how to use some tools to help you stay up-to-date, I want to share with you some info about the two types of Twitter chats. 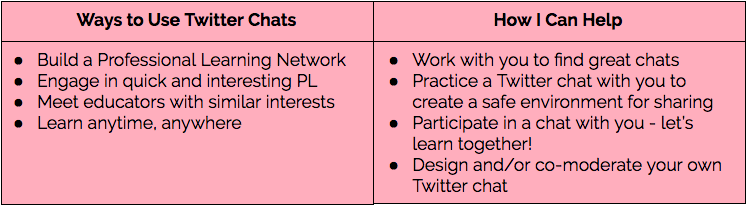 (Back up - there are two types of Twitter chats? Yes!) Traditional Twitter ChatThe most common type of Twitter chat is a public conversation attached to one unique hashtag. One or more predesignated moderators will ask questions at regular intervals. Anyone can follow along and participate. They are typically recurring and revolve around the same general topics each time. They are usually an hour long (some are even shorter!), so I am not committed to spending a lot of time participating, and they are isolated. If I miss a chat one week, I can jump right back in the following week without missing a beat. There are two reasons I find Twitter chats to be a powerful PL experience: 1) Every individual Twitter chat provides an opportunity to think about great questions surrounding my areas of interest. (I only use a professional Twitter, so my interests are always related to education, technology, and leadership). I always walk away inspired, and usually with at least one great resource or idea to delve into further. 2) You make great connections with other people who share your interests. I have found and connected to some incredibly inspirational people just by joining Twitter chats. This is a great way to grow your circle of inspiration and “meet” educators who contribute some incredible resources to the Twitterverse. This is really what building a PLN is all about! Admittedly, Twitter chats can feel pretty fast and furious, and while that makes them exciting, it can also feel overwhelming at types. If that’s not your thing, you might like... Slow ChatsSlow chats work in many ways just like a regular Twitter chat. Both types of chats focus on a specific topic, and the moderator(s) will ask questions at regular intervals. The difference is that Twitter slow chats span a week rather than an hour. Participants answer the questions (usually one question per day) throughout the week at their own pace. The moderator of the chat then has more time to ask follow-up questions to the whole chat or to a specific participant. This format can allow for more opportunities for deeper thinking or to seek better understanding of someone’s response. Join the ConversationNow that you know the difference between the two types of Twitter chats, it is beneficial to understand the format so that you are comfortable engaging. Usually a Twitter chat will start with the moderator asking you to introduce yourself. You’ll want to include your name (first name only is fine), and it’s also nice to include a little bit of your background so that the other participants understand your role in education.  There are also fun ways to introduce yourself, such as including your Bitmoji (in case you haven’t noticed, I’m a big fan!) or a funny .gif.  Most Twitter chats follow the Q/A format, meaning that each question will be labeled Q___ (with the question number). When you answer that question, you start your answer with A___ to signify which question you’re answering. 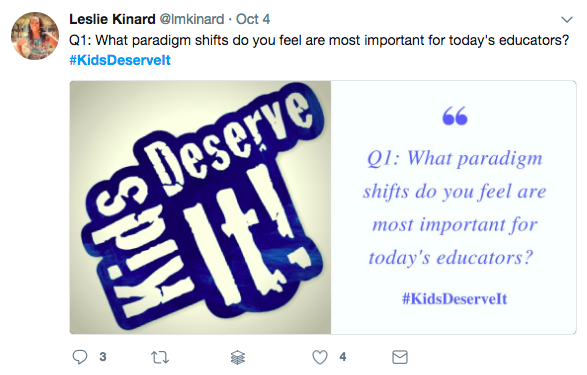 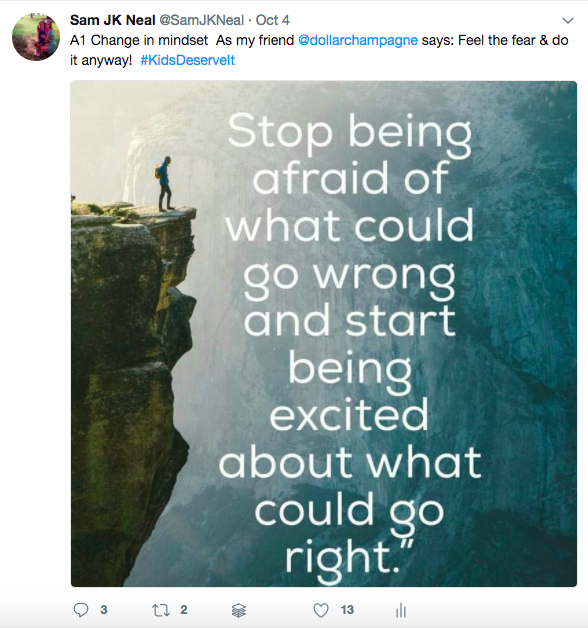 During the chat, you can answer the questions, read other answers, and reply or ask follow-up questions. It’s always fun when someone affirms your opinions, or asks a great follow-up question to challenge your thinking. It’s how we grow! 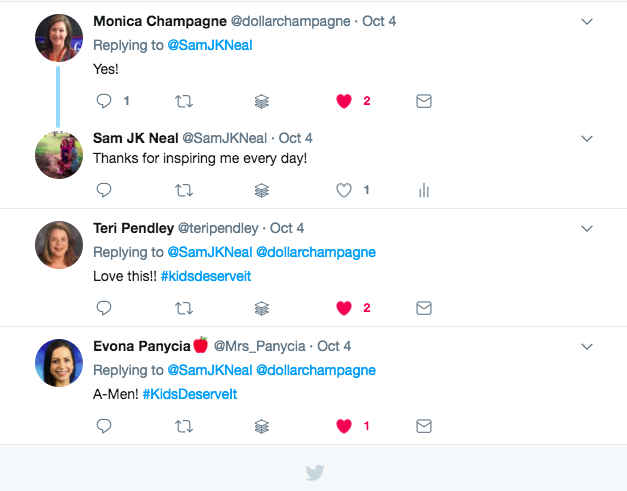 Twitter chats have become one of my favorite modalities of PL because they are quick, connect me to individuals who challenge me to be better, and can happen anytime, anywhere for personalized learning. Some of my personal favorite chats are: 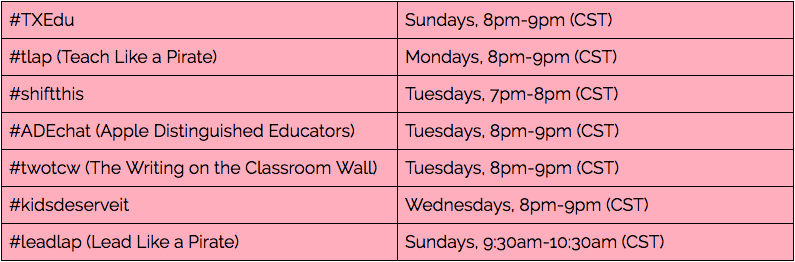 What are some of your favorite chats? What tips do you have for someone new to Twitter or Twitter chats? Share in the comments! We live in a world that recognizes now, more than ever, the power of collaboration. We ask our learners to do it. We ask our teachers to do it. We ask our administrators to do it. Today’s post is a collaboration with my teammate and frequent thought partner Megan Kozar. Even though Megan and I are on different campuses, we are on the same team, and frequently find that each campus is utilizing similar tools - or even asking similar questions. Both of us have been asked about where we design graphics for our sites, so we wanted to do a quick tutorial to show you how we both use Canva. Canva can be a useful tool for you in your classroom: 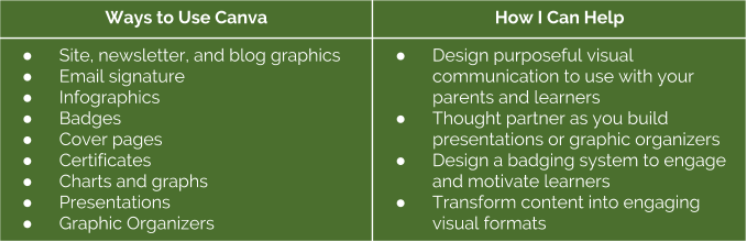 To show you some of the ways Canva can help you create your visuals, we are going to collaborate on a design for the quote that inspired this post: “Alone we do so little, together we can do so much.” It’s a great quote, but it loses its impact when it merely appears in the center of all this text. Instead, we’re going to use a simple premade Canva layout to give the quote the attention it deserves. Canva has lots of premade graphic sizes you can pick from, such as Photo Collage or Website Banner, which makes getting started so much less intimidating. We selected the Social Graphic size: 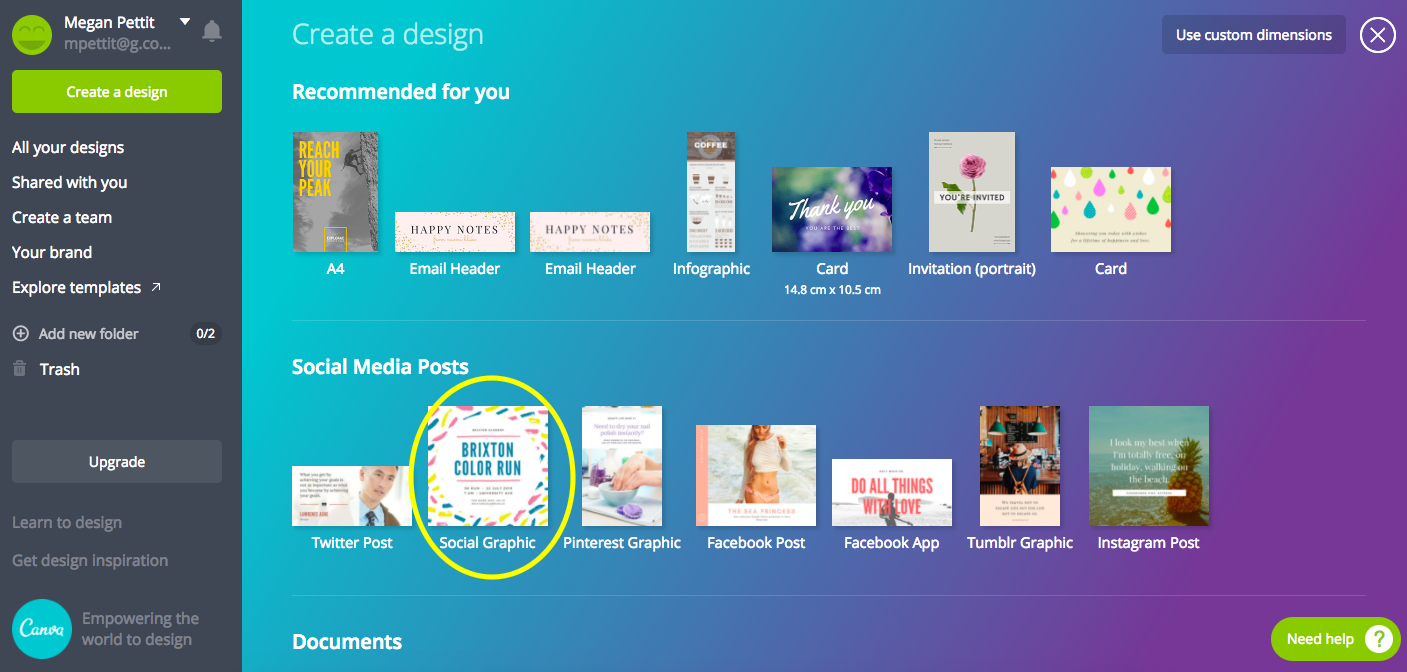 We wanted to keep it simple, so we selected a layout from Canva’s bank. Some layouts and images in Canva cost money, so be sure to select one with the tag “Free” in the bottom right corner of the layout or graphic. 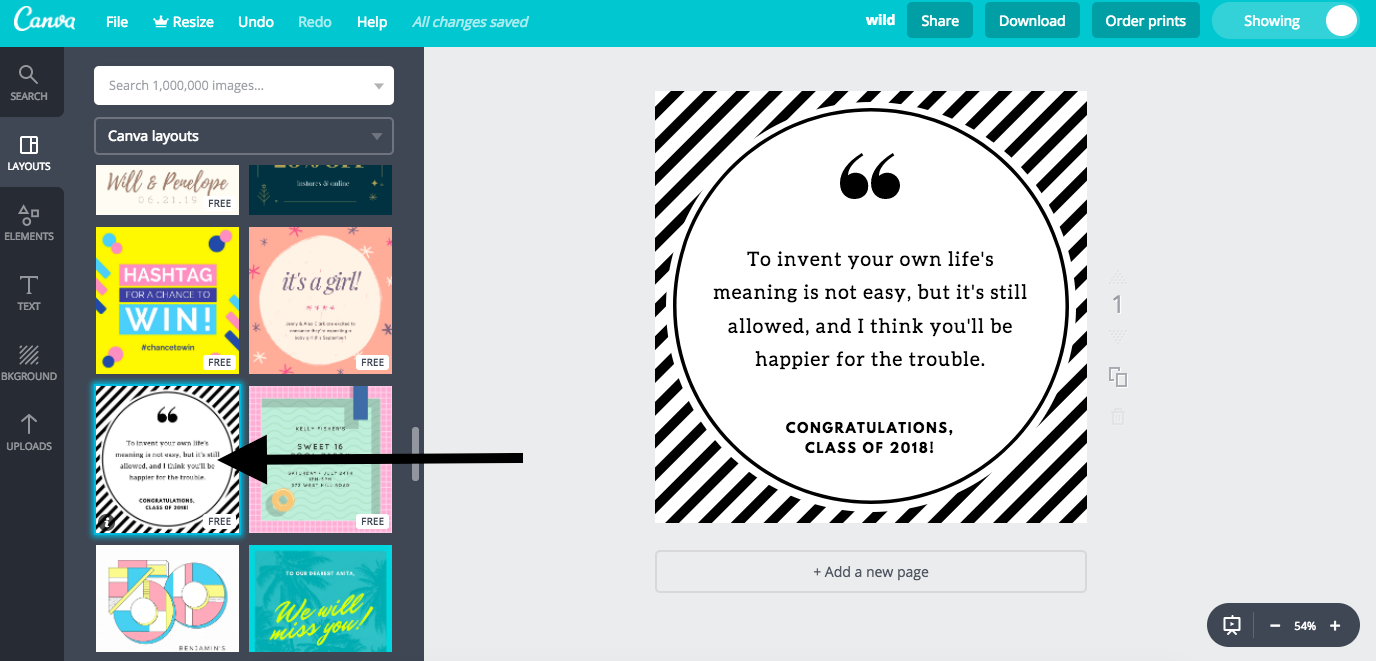 Next we added our quote in the text box. We wanted to be sure to attribute our quote to the speaker, so we added a small text box beneath our quote.  We changed the colors of some of the pieces by clicking on the object, clicking on the color box at the top of the screen, and then choosing a new color. 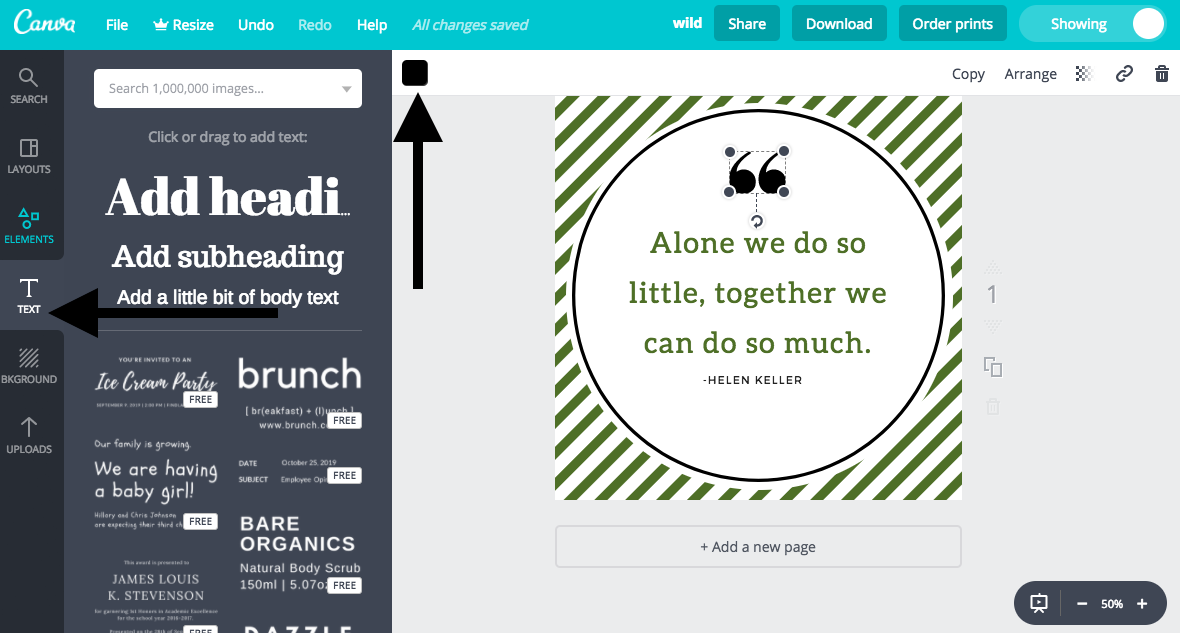 Once we were happy with the design, we clicked Download and chose PNG. Depending on your purpose, you could also choose JPG or even PDF. 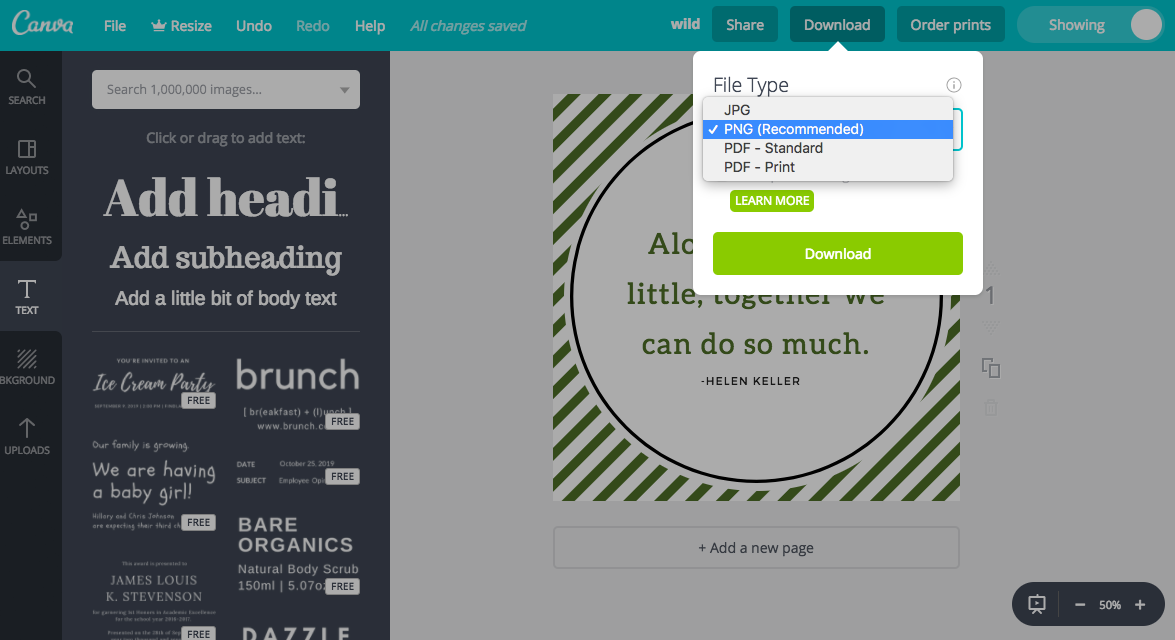 Look at the difference! 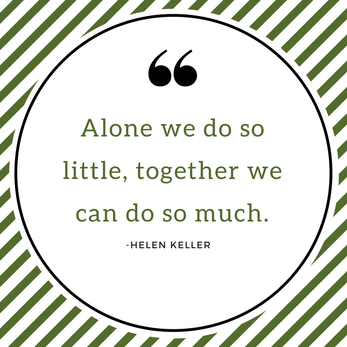 Let me know how I can help you transform the visuals in your classroom using this great tool!
In my last post, I gave you some tools to help you find the best Twitter chats. Now that you’ve found some great Twitter chats to join (or even just creep), you might be wondering: How can I keep up with all of these great conversations?
The truth is, you can’t always because Twitter doesn’t sleep, but there are some great tools to help you keep up-to-date as much as you can/as much as you want. In the spirit of transparency, I’ll confess: I’m really not that great at Twitter. I’m just not the most consistent user. I could go weeks without checking my feed, and then I’ll check it every day until the next time I disappear. In my new role, I am being more intentional about tweeting with more regularity, but it can still be daunting to try to catch up with everything that’s published. That’s why today I’m sharing two tools that help make Twitter a little more manageable so that you can jump right into building your PLN. Twitter Lists
This is a feature built into Twitter. It’s exactly what it sounds like: You can make lists of people you follow on Twitter. When you want to narrow your browsing, you can simply open that list and browse just the tweeps you want to see.
To create a list on the app, click on your Profile picture. In the menu on the left, choose Lists, then select the Create List icon in the top right corner of the screen. Name your list, describe it if you’d like, then determine if you’d like for this to be a Private or Public list. Private lists can be useful tools if you are curating your own PLN and want to categorize those you follow. For example, you might have jumped into a couple of #tlap chats (Teach Like a Pirate - and who doesn’t want to do that?) and found a few key tweeps who inspire you or pose great questions. You could add just those tweeps to your private list. Lists can also be public, which means there might already be a great list curated that you want to follow. Simply go to the profile of someone you follow, click on Lists (top of the profile underneath the banner image), select the list that interests you, and then click Subscribe on the left. For more step-by-step tutorials, check out Twitter’s Support resources: TweetDeck
I just learned about TweetDeck last week, and it has changed my Twitter game. Seriously, how did it take me this long to discover this great tool? (I told you I wasn’t that great at Twitter.)
TweetDeck, like Lists, is a feature Twitter provides for you. On TweetDeck, you can view your entire Twitterverse in a simple-to-read, easy-to-customise column view.
You can see my deck below. If I were to scroll right, you’d see a lot more columns with different hashtags and chats I like to keep up with, along with columns displaying my Twitter Lists. Pretty cool, huh? 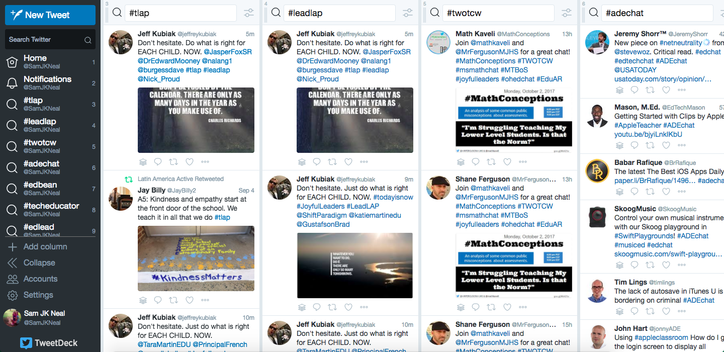
TweetDeck makes it easy for me to jump on Twitter for just a few minutes at a time, view the content that interests me, jump in where I want, and then move on - because, really, the point isn’t that I read every single Tweet out there. I can’t and, frankly, I don’t want to. But I can take in what I want without feeling overwhelmed, and I can just look at the content that interests me, challenges my thinking, and inspires me to grow. And that’s really the point of a PLN - personal growth. Want to learn how to set up your TweetDeck? Check this out! 
In the next post of this short series, I’ll talk about just how a Twitter chat works.
Happy learning! |


 Powered by
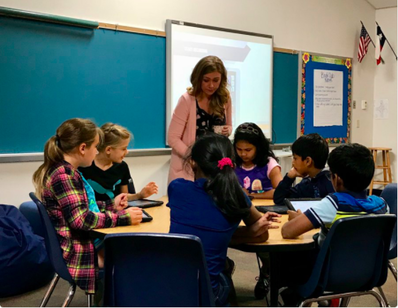

 RSS Feed